Showing posts with label Cookies. Show all posts

Saturday, January 4, 2014

What's Baking's December Roundup: Christmas Traditions

This month I was the host of the What's Baking recipe challenge.  I chose Christmas traditions (savory or sweet) because I love to see all the different traditions from family to family.  When I was a kid, I thought everyone celebrated the same way we did, and as I grew up I found that it seems like everyone had slightly different traditions than I did.


I apologize to the group for not participating this month.  I thought I would be able to get something made either while on vacation or immediately when I got back, but driving 16 hours alone in the car took more of a toll on me than I thought it would.  Please enjoy looking at the recipes the two participants chose to make and read more about their family's traditions:

Amanda from Our Italian Kitchen, made Christmas Sugar Cookies with Glazed Icing.  Her and her family gather every year and make cookies and this is a recipe that she likes to make.


Ange, from The Tiny Tyrant's Kitchen, made Ricotta Cookies.  Every year, she makes a ton of Christmas cookies and this year she decided to try a cookie she loves but has never made herself.


Thanks for participating in this month's What's Baking Challenge Amanda and Ange.  I had fun reading about your traditions, and both cookies look delicious! 

Tuesday, October 15, 2013

12 Weeks of Christmas Treats: Pumpkin Snickerdoodles

When I think of treats that I want at Christmas, they are things that remind me of home.  Home is what makes Christmas so special in my mind, probably because it is the one time of year that I tend to make it home more than any other.  The things that make desserts seem like home are pumpkin, cinnamon, and spices like allspice.  I think that is why pumpkin pie, apple pie, etc make it to the top of everyone's favorite dessert lists.


I decided to make a dessert for 12 Weeks of Christmas Treats, hosted by Brenda at Meal Planning Magic, that doesn't scream Christmas, but reminds you of home. 

Pumpkin Snickerdoodles
from Recipe Girl
Ingredients
Cookies
1 cup (2 sticks) salted butter, at room temperature
1 cup granulated white sugar
1/2 cup light brown sugar
3/4 cup pure unsweetened pumpkin puree
1 large egg
2 teaspoons vanilla extract
3 3/4 cups all-purpose flour
1 1/2 teaspoons baking powder
1/2 teaspoon salt
1/2 teaspoon ground cinnamon

Rolling Sugar
1/2 cup granulated white sugar
1 teaspoon ground cinnamon
1/2 teaspoon ground ginger
1/2 teaspoon allspice

Directions
1) In a large bowl, use an electric mixer to cream the butter until fluffy. Add sugars and pumpkin puree and beat well. Mix in egg and vanilla, scraping down sides of the bowl to incorporate all of the ingredients.
2) In a medium bowl, whisk together flour, baking powder, salt and ground cinnamon. Beat flour mixture into liquid mixture a little at a time just until incorporated.
3) Cover dough with plastic and chill at least an hour, or until dough becomes slightly firm.
4) When ready to bake, preheat oven to 350°F. Line baking sheets with parchment paper (or spray with nonstick spray). Mix rolling sugar ingredients in a small bowl.
5) Remove cookie dough from refrigerator. Use a medium cookie scoop (1 1/2 Tablespoons) or a large spoon to scoop out dough and roll into balls. Use your hands to roll the balls in the cinnamon sugar and make sure they're coated really well. Place 2 inches apart on the prepared baking sheets. Use a glass with a nice, flat bottom dipped in sugar and flatten the balls.
6) Bake at 350°F. for 15 minutes, or until they are slightly firm to the touch. Let cool on baking sheets for 5 minutes or so, then remove them to a wire rack to cool completely.


The only comment that I have about this recipe is that the original cooking time (10 to 14 minutes), listed on the Recipe Girl website didn't work for my cookies.  My oven was still heated from dinner by the time I put the cookies in and they were still underdone in the center.  I think fifteen minutes should be the low end of baking time for these cookies.

I did love these cookies.  Pair them with a glass of milk and you have a perfect dessert, in my opinion.  I love finding delicious pumpkin recipes to try outside of pumpkin pie.  This one hits the spot. 

Monday, October 7, 2013

Secret Recipe Club: Granola Cookies

My husband deploys for six months starting tomorrow.   We've known he was going to deploy for awhile, but we just found out the day that he was leaving less than a week ago.  Needless to say...things have been stressful at our house.  I was thankful for the Secret Recipe Club this month because it gave me some respite from the stress and allowed me some time just to think about baking for awhile.

Secret Recipe Club

This month's assignment was Love and Flour, written by LeAndra.  I actually found my recipe by going and looking at things pinned from Love and Flour on Pinterest.  It helped me focus my eyes onto this great Granola Cookie recipe.  Please go check out all the delicious desserts on Love and Flour, and also check out her Oktoberfest series.  All the recipes look delicious.

Granola Cookies
from Love and Flour
Ingredients
2¼ cups all-purpose flour
1 teaspoon salt
1 teaspoon baking powder
½ teaspoon baking soda
1 cup (2 sticks) butter, softened
1¼ cups light brown sugar, packed
¾ cup granulated sugar
2 eggs
2 teaspoons vanilla extract
2 cups granola
1 cup chocolate chips
½ cup dried cranberries or cherries
 
Directions
1) Cream the butter and sugars together until light and fluffy, about 1 to 2 minutes.
2) Beat in the eggs and the vanilla until the mixture is well incorporated and smooth.
3) Whisk together the flour, salt, baking powder and baking soda.
4) Now beat in the flour mixture until incorporated.
5) Stir in the granola, chocolate chips and dried cranberries.
6) Drop the dough by rounded tablespoons onto a parchment-lined baking sheet.
7) Bake at 350 degrees for 10-14 minutes until golden brown along the edges and puffed in the centers.
8) Allow the cookies to cool on the baking sheet for a few minutes before transferring to a wire rack to cool completely.


I have this amazing cherry vanilla granola that I buy in stores and it worked perfectly for these cookies.  I love cookies with little surprises in them and between the crunchiness of the granola, the sweetnes of the chocolate, and the tanginess of the cranberries, these cookes are the perfect balance of everything good in a cookie. 
 
Please browse through all the other recipes made this month.  I plan to cook a lot while my husband is gone to pass the time, so please check back if you have a chance. 


Tuesday, September 24, 2013

Cherry Surprise Crinkles

It is time for another 12 Weeks of Christmas Treats.  This great idea is hosted by Brenda at Meal Planning Magic.  I love this recipe get-together because it provides great ideas once Christmas actually rolls around (I don't have enough self restraint to keep all of these good treats in my freezer until Christmas).


One of my guilty pleasures around Christmas is chocolate covered cherries.  There is something about the combination of cherries and chocolate that just seem so Christmas-y to me.  For my first treat, while I would love to make chocolate covered cherries, I know they would never live up to my favorite treat, so I decided to make these Cherry Surprise Crinkles.  They combine the two greats into cookie form that creates a delicious cookie.

Cherry Surprise Crinkles
from Better Homes and Gardens
Ingredients
1/2 cup butter, softened
1 cup granulated sugar
1/2 teaspoon baking powder
1/4 teaspoon baking soda
1/4 teaspoon salt
1 egg
1 teaspoon almond extract
2 cups all-purpose flour
1/2 cup chopped maraschino cherries, well drained and patted dry with paper toweling
12 Kisses cherry cordials or Kisses dark chocolates
Powdered sugar

Directions
1) Preheat oven to 350 degrees F. In a medium mixing bowl beat butter with an electric mixer on medium to high speed for 30 seconds. Add the granulated sugar, baking powder, baking soda, and salt. Beat until combined, scraping sides of bowl occasionally. Beat in egg and almond extract until combined. Beat in as much of the flour as you can with the mixer. Stir in any remaining flour and the cherries.
2) Take a tablespoon of dough. Shape each portion into a ball around a Kiss. Place balls 2 inches apart on ungreased cookie sheets.
3. Bake for 10 to 12 minutes or until bottoms are light golden brown. Transfer cookies to a wire rack and let cool. Lightly dust cooled cookies with powdered sugar


I thought for sure that I'd be eating these cookies alone in my house because I'm much more into the cherry and chocolate combination than my husband, but after only 2 days, there were only enough for the picture.  Success in my mind.  I wish that the Maraschino cherries has a better quality to them, but these were fantastic cookies. 
 
Please see all the other treats below.
 

Sunday, April 28, 2013

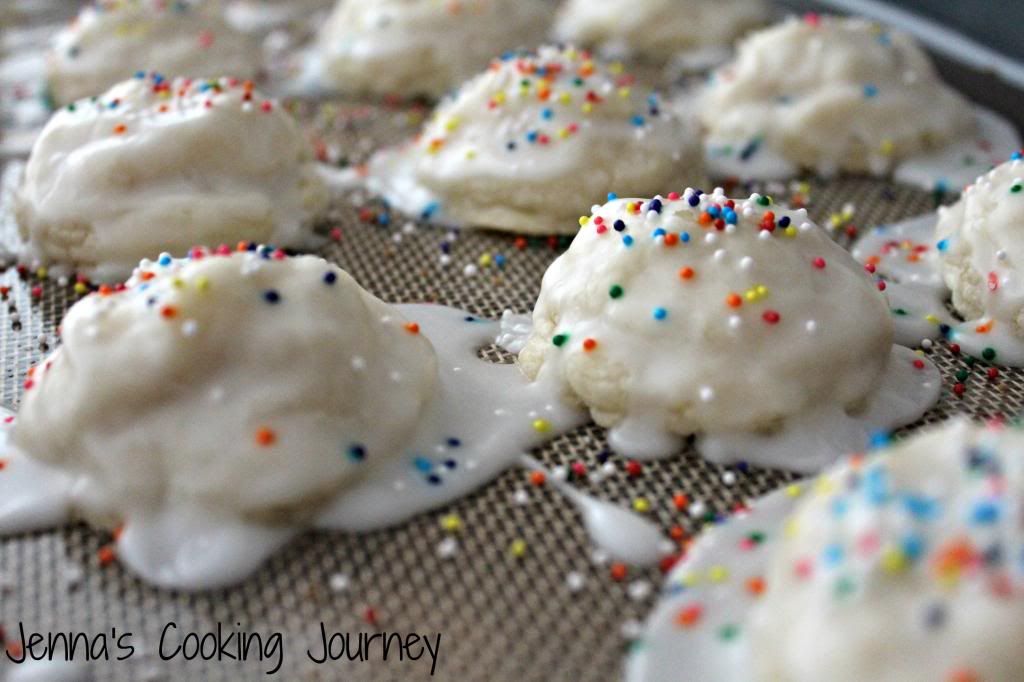
Cream Cheese Meltaways

When I was a kid, I'd lose stuff and then have difficulty finding it again.  My dad was in the military, and the ID card that they give everyone was always the first thing to disappear.  My parents used to say, "It will always be the last place you look."

I felt very much that way for this baking challenge, for which Amanda from Our Italian Kitchen chose mini/bite sized treats.  Everything I found was delicious looking truffles, and I couldn't find anything that I actually had to bake.  I was so stuck on the truffle idea that I had almost given up, until I found these Cream Cheese Meltaways at Alida's Kitchen.  I found what I was looking for in the last place I looked.


Cream Cheese Meltaways
from Alida's Kitchen
Ingredients
1 1/4 cups all-purpose flour
1/2 cup cornstarch
1/8 teaspoon salt
1 cup powdered sugar
1/2 cup butter, softened
2 ounces cream cheese
1 teaspoon vanilla

Glaze
1 3/4 cups powdered sugar
1/4 cup  fresh lemon juice

assorted sprinkles, for decorating (optional)

Directions:
1) Preheat oven to 375 degrees.  Line cookie sheets with parchment paper and set aside.
2) In a medium bowl, whisk flour, cornstarch and salt until combined.
3) In a large bowl, add powdered sugar, butter, cream cheese and vanilla and beat at medium speed until light and fluffy. 
4) Add flour mixture to butter mixture, stirring until combined.  (Note: dough will be dry and crumbly). 
5) Shape dough into 1-inch balls (be careful not to overwork dough) and place on prepared cookie sheets.
6) Bake for 8 to 10 minutes, or until bottoms of cookies are lightly browned.  Cool 5 minutes of pan and then move to wire rack to cool completely.

Glaze:  In a medium bowl, whisk powdered sugar and lemon juice until smooth.  Dip the tops of cooled cookies into glaze and place on wire rack.  Decorate with sprinkles, as desired.  Let cookies stand until glaze is set.


I have to admit that I thought these cookies were more addicting without the glaze.  To me the glaze tasted better after it had awhile to sit, but I still think they were better without.  These were slightly bigger than bite sized for me, but I definitely could have made them smaller too.  I only yielded 20 cookies, while Alida said the recipe makes 36.  These are fantastic cookies, and I'm glad I ran across them for the challenge.
 

Tuesday, April 9, 2013

Triple Peanut Butter Bars

Back around Christmas, I participated in a cookie swap.  The person that I received said that she loved peanut butter cookies and oatmeal caramelitas, so I set out to research something that could infuse the two.  For the longest time, I wasn't finding anything and then one day on pinterest, I guess I entered the magic search phrase and these appeared.  They have some of the same qualities as a caramelita (the crumbly oatmeal bottom and top layer) but the flavorful middle part.   

The cookie swap was a success, but I never posted the recipe for my cookie bars because I never took a picture.  Recently, I decided to make these for Jacob's coworkers and so I snapped a shot so I could post these bars.  

Triple Peanut Butter Bars
slightly adapted from Midwest Living
Ingredients
1 1/2cups quick-cooking rolled oats
1 cup all-purpose flour
1 1/2 cups packed brown sugar
1 teaspoon baking powder
1/2 teaspoon baking soda
1 cup butter
1/2 cup chopped, unsalted dry roasted peanuts
1 cup peanut butter-flavored pieces
1/2 cup semi-sweet milk chocolate chips
1 cup packed brown sugar
1/4 cup butter, cut into pieces
1/4 cup peanut butter
1 egg, lightly beaten
1 1/2 teaspoons vanilla
1 1/4 cups all-purpose flour
1/2 teaspoon baking powder
1/4 teaspoon baking soda

Directions
1) Line a 15x10x1-inch baking pan with foil, extending the foil over edges of pan; set aside.
2) For crust: In a large bowl, combine oats, the 1 cup flour, the 1-1/2 cups brown sugar, the 1 teaspoon baking powder and the 1/2 teaspoon baking soda. Using a pastry blender, cut in the 1 cup butter until mixture resembles coarse crumbs.
3) Remove 1 cup of crumb mixture to reserve for topping. Stir peanuts and peanut butter-flavored pieces into the 1 cup reserved topping mixture; set aside.
4) Press remaining crumb mixture onto the bottom of prepared baking pan. Bake in a 350 degree F oven for 10 minutes. Cool at least 15 minutes in pan on a wire rack.
5) In a medium saucepan, heat the 1 cup brown sugar, the 1/4 cup butter and peanut butter over medium heat until butter melts and mixture is smooth, stirring constantly. Cool slightly. Stir in egg and vanilla. Stir in the 1-1/4 cups flour, the 1/2 teaspoon baking powder and the 1/4 teaspoon baking soda. Drop in very small mounds evenly over the crust in pan. Sprinkle with reserved topping mixture.
6) Bake in a 350 degree F oven for 18 to 20 minutes or until a wooden toothpick inserted near center comes out clean. Cool completely on wire rack before lifting from pan using edges of foil and cutting into bars.
 
 
These to me are the perfect bars.  They have a little bit of chocolate, the peanut butter, and then the crumbly cookie portion.  I think these would make the perfect summer picnic bars for parties or even just park trips.  They are pretty crumbly, so make sure you have a crumb-catcher in hand (or a dog/vaccuum cleaner)...plus a really big glass of milk.  All the great desserts need a good glass of milk.

Friday, March 29, 2013

Monster Magic Cookie Bars

For the longest time, I was scared of desserts.  My lean-to when I was asked to bring desserts were boxed Magic Cookie Bars from the baking aisle in Wal Mart.  When I was assigned Kate's Recipe Box for the Recipe Swap that A Taste of Home Cooking hosts, I ran across a lot of great sounding recipes (Tex-Mex Sloppy Joes and Make it Yourself Shamrock Shakes).  But when I saw the Monster Cookie Bars, I realized that I haven't touched Magic Cookie Bars since I got really into cooking.  While these are slightly different than the ones in the box at Wal Mart, I decided these would be what I'd make for the swap.


Monster Magic Cookie Bars
slightly adapted Kate's Recipe Box
Ingredients
9 full graham crackers
4 tablespoons butter, melted
1 can sweetened condensed milk
3/4 cup old fashioned oats
3/4 cup M&Ms
3/4 cup peanut butter chips
3/4 cup mini chocolate chips

Directions
1) Preheat oven to 350F degrees. Grease a 9×13″ baking pan.
2) Crush graham crackers into crumbs using a food processor or rolling pin.
3) Mix in melted butter until well-combined. Press crumbs into lined baking dish.
4) Evenly pour the sweetened condensed milk over the graham cracker layer. Sprinkle the oats, M&Ms, peanut butter chips and chocolate chips evenly over the sweetened condensed milk. Gently press in a little.
5) Bake for 30 minutes or until browned and pulling away from the edges of the pan. Let cool completely before cutting.


I love these bars because the graham crackers and the sweetened condensed milk base provide such a blank slate for any of your favorite dessert toppings.  I threw in some peanut butter chips that I had sitting in my pantry and I think it just enhanced the 'monster-ness' of these bars.  While I don't have kids, I think this would be a great rainy/snow day activity with your child.  Have them roll the graham crackers and build their idea of a monster cookie bar.  There is no wrong topping in the monster magic cookie bar world.

Please check out all the other great recipes below!


Tuesday, March 26, 2013

S'More Peanut Butter Cookies

This month's What's Baking Challenge is hosted by Beantown Baker. She chose sprinkles as this month's theme.  Stop by her blog in a few days to see her round up of what everyone made this month.


I have to admit that I see sprinkles on about the same level that I see glitter.  They just get EVERYWHERE when you're trying to use them.  While it makes your stuff pretty, it usually isn't worth the hassle of cleaning little beads up for the next few months.

Since sprinkles are something that I loved as a kid...I decided to try to find something to bake that reminded me of being a kid.   While searching, I found these S'More Peanut Butter Cookies.  I LOVED S'Mores when I was a kid.  So why not combine s'mores with sprinkles and have the most fun cookies around.

S'More Peanut Butter Cookies
as seen on Sally's Baking Addiction
Ingredients
1/2 cup (1 stick) salted butter, softened to room temperature
1/2 cup light brown sugar
1/4 cup sugar
1 egg
3/4 cup creamy peanut butter
1 tsp vanilla extract
1/2 tsp baking soda
1 and 1/4 cups all purpose flour
12 large marshmallows, cut in half
8 oz melting chocolate (such as Baker's)
sprinkles
 
Directions
1) In a large bowl, using a hand-held mixer or stand mixer with paddle attachment, cream the butter and sugars together on medium speed. Mix in the peanut butter, egg, and vanilla (in that order). Scrape down the sides as needed. Slowly mix in the baking soda and flour. Do not overmix. Chill the dough for at least 30 minutes.
2)  Roll 1.5 Tablespoons of dough into a ball. Place onto ungreased cookie sheet or silicone baking mat. Bake for 7 minutes.
3) Remove from oven and place marshmallow on top, gently pressing it down into the warm cookie. Place back into the oven for 2-3 more minutes so the marshmallow can melt and the cookie can finish baking.
4) Remove from oven and allow to cool for about 5 minutes.
5) As the cookies cool, melt chocolate according to package directions. Spoon about  two teaspoons of chocolate on top of each marshmallow and swirl around with the back of the teaspoon. Top with sprinkles.


The only complaint that I have about these cookies is that some of the marshmallows completely disintegrated under the chocolate.  The majority of them looked great, but some of them fell completely apart.  Taste wise these aren't exactly like S'Mores, but they're so delicious.  I actually love the little crunches that the sprinkles provide in the chocolate.  It is a great contrast to the puff of the marshmallow and the soft peanut butter cookie.  During this challenge, I learned that sprinkles aren't as bad as I thought they were...although a lot of them got all over my oven.  I'll have to play more with the rest of the bottle that I have. 
 
Thanks Jen for a great challenge!


Thursday, October 11, 2012

12 Weeks of Christmas Treats: Carrot Cake Whoopie Pies

I can't believe it is the third week of the 12 Weeks of Christmas Treats already.  Please check out Meal Planning Magic for details about the 12 Weeks of Christmas Treats and for awesome recipes.


When I was a little kid, I was OBSESSED with Rudolph.  I saw the movie with Rudolph and Clarice and fell in love with him.  When Christmas Eve came around, I always cared more about leaving treats for Rudolph than I did for Santa even though Santa left the presents and Rudolph didn't.

My parents were always really creative and came up with great answers to my Santa questions when I was a kid, so when I asked questions about Rudolph, they always had answers. How does Rudolph fly? - Much like Peter Pan, he thought happy thoughts and away he went.  How did Rudolph always have enough energy to fly all over the world hauling a giant red Santa and all the presents?- Kids left him carrots which improved his eye sight and were healthy, so he always had energy.

In honor of Rudolph, I decided to make this wonderful Christmas treat.

Carrot Cake Whoopie Pies with Cream Cheese Frosting
slightly adapted from Quick Feet, Good Eats
Ingredients
1 cup (2 sticks) unsalted butter – room temp
3/4 cup packed dark brown sugar
3/4 cup granulated sugar
2 large eggs – room temp
1 1/2 teaspoon pure vanilla extract
2 cups all-purpose flour
1 teaspoon baking powder
1 teaspoon baking soda
1/4 teaspoon salt
1 1/2 teaspoon cinnamon
1/2 teaspoon freshly ground nutmeg
1/2 teaspoon ground ginger
1 1/2 cup grated carrots – about 3 large carrots
1 cup raisins
1/2 cup toasted chopped walnuts

Directions
1) Line two baking sheets with parchment paper, silpats, or simply spray with cooking spray.
2) In a mixer, beat butter and sugars on medium speed until light and fluffy (about 3 – 4 minutes in a stand mixer).
3) Add eggs and vanilla and beat on medium until well combined.
4) Sift together flour, baking soda, baking powder, salt, cinnamon, nutmeg and ginger; whisk to combine. Gradually add flour mixture to butter mixture; mix on low until just combined. Do not overmix.
5) Mix in carrots, raisins and walnuts. Chill dough for at least 1 hour. (Mine stayed in the fridge almost an entire day covered with plastic wrap)
6) Preheat oven to 350 degrees.
7) Shape tablespoons of dough into balls and place on prepared baking sheets, spacing 2 inches apart. Or press into a whoopie pie pan.
8) Bake until browned and crisp around the edges, 15 to 20. Transfer to a wire rack to cool completely.

Cream Cheese Frosting
Ingredients
1 cup of butter, at room temp
8 oz cream cheese, at room temp
3 cups confectioners sugar
1 splash vanilla extract
Directions
1)  Combine butter and cream cheese in mixing bowl and mix on medium speed for 5 minutes.
2) While mixing at a low speed, add sugar. Once combined, add a splash of vanilla extract and mix on a medium to high speed for 3 minutes, or until smooth and fully combined. Frost whoopie pies and enjoy!


Even though these aren't healthy, and wouldn't help me fly around the world carrying Santa and presents, they were amazingly delicious.  I forgot the oats in the original recipe, but in all honesty, they were delicious without them.  They had a lot of holiday flavors with the cinnamon, nutmeg, and ginger, so I think these would be perfect on a holiday table.  My husband took a bite and declared "These are a keeper!" 

Check out all the other recipes below!


Wednesday, October 10, 2012

Chocolate Oatmeal No-Bake Cookies

I used to hate baking.  It just seemed like such a hassle and a mess to pull one dessert together.  Something snapped a few months ago and I now like to bake quite a bit.  I still love the simple desserts that don't require too much effort.

One of my favorite cookies are No-Bake Cookies.  You get little mounds of cookies in about fifteen minutes, and they usually cool pretty quickly.  Plus the ingredients are just things that go really well together: chocolate, peanut butter, oatmeal, it is all good things in one bite (if you only have one cookie...which is difficult).

Chocolate Oatmeal No-Bake Cookies
from One More-Moore 
Ingredients
1/2 cup butter
2 cups sugar
1/2 cup milk
4 tablespoons cocoa
1/2 cup peanut butter
3 cups Quick-Cooking Oats
2 teaspoons vanilla

Directions
1) Add the first four ingredients in a saucepan.  Bring to a rolling boil, and boil for a minute.
2) Stir in the next three ingredients and drop onto wax/foil paper.  Let cool until set.


These cookies are also really great when it is too hot to bake, although since we're entering fall, I don't think that'll be a problem for awhile.  These are the best no-bake cookies that I've ever made.  I think the peanut butter and chocolate ratio is perfect.  I had to send these to work with my husband so that we didn't eat too many of them. 


Thursday, September 27, 2012

12 Weeks of Christmas Treats: Puppy Chow Cookies

A week ago, someone on my cooking forum posted about the 12 Weeks of Christmas Treats, hosted by Meal Planning Magic.  For the next twelve weeks, the group will be posting all types of different treats.  Anything you might have out on a holiday table for munching on or serving at your holiday parties is game for the blog hop, so check back every week for amazing posts that will be perfect to make for the biggest holiday of the year.


Every year around Christmas, my mom breaks out the puppy chow.  The delicious mix covered in peanut butter and powdered sugar.  Our family is addicted to it, so it disappears VERY quickly.  I think she makes more and more batches every year.

Right before I found out about the 12 Weeks of Christmas Treats, someone pinned these Puppy Chow Cookies on Pinterest, and I pinned them.  I knew they were an absolutely perfect start to this blog hop, so I jumped on making them. 

Puppy Chow Cookies
Peanut Butter Cookies from Jenna's Cooking Journey,
Puppy Chow ingredients from Betty Crocker 
Ingredients  
Cookies 
1/3 cup vegetable shortening
1/2 cup granulated sugar
1/2 cup packed light brown sugar
1 large egg
1 teaspoon vanilla extract
3/4 cup smooth peanut butter
1 1/2 cups all purpose flour
1 teaspoon baking soda
1/2 teaspoon salt
Coating 
1 cup semisweet chocolate chips (6 ounces)
1/4 cup unsalted butter
1/4 cup peanut butter
1 teaspoon vanilla
1 1/2 to 2 cups powdered sugar

Directions
1) Preheat your oven to 350 degrees.  Line two baking sheets with parchment paper or a silicone mat.
2) In a mixing bowl, combine the shortening, sugars, egg, vanilla, and peanut butter until the mixture is smooth.
3) Scrape down the bowl, and add the flour, baking soda, and salt to the wet mixture.  Beat slowly until dough is just combined.  This is a dry dough, so it could take awhile to mix.  If the dough seems too crumbly, add a little water at a time until the dough is no longer crumbly.
4) Using a scoop, drop the cookie dough onto your baking sheet, leaving 2 inches between each cookie. 
5) Take a fork and flatten the cookie to a 1/2 inch thickness, making a cross-hatch type of design.
6) Bake the cookies 12-16 minutes, until they just start to brown around the edges.  The tops will not brown at this point.
7) Allow cookies to cool completely.
8) In small microwaveable bowl, microwave chocolate chips, butter and peanut butter uncovered on High for approximately 1 minute to 1 minute 30 seconds; stir until smooth. Stir in vanilla.
9) Place powdered sugar in a gallon-sized zip-lock bag.  Coat each cookie with a thin layer of chocolate and then coat each cookie with powdered sugar in the zip-lock bag.  Repeat until all cookies are coated.


I made peanut butter cookies from scratch not too long ago, so I decided to use freshly made cookies instead of package ones.  I guess it depends on how much time you have in the Christmas season to do everything from scratch or you decide to do things the "Semi-Homemade" way.  I loved these cookies.  It had the same ideas as puppy chow but in a cookie form.  The powdered sugar isn't as messy (in eating form) as I thought it would be.  The cookie making process is definitely messy, but fun times will be had by all in the kitchen.

Please take the time to read all the other recipes below.  Check back next Thursday for another tasty treat!


Monday, September 24, 2012

Red Velvet Cookies with Cream Cheese Frosting

My husband and I were talking about Red Velvet things recently, and he asked me to make a Red Velvet dessert.  I can't eat Red Velvet things because I am allergic to red dye, so I thought I'd attempt to make whoopie pies.  Shortly after the first batch came out of the oven, I knew I messed up the size of my cookies, and I wouldn't have enough cookies to make pies for everyone in Jacob's office.  So, I just decided to turn them into frosted red velvet cookies.

This past weekend, I bought a cookie scoop, so hopefully my cookies will be more uniform in the future so that I can attempt whoopie pies again.

Red Velvet Cookies
from Annie's Eats
Ingredients
Cookies
2 cups all-purpose flour
2 tablespoons cocoa powder
½ teaspoon baking powder
¼ teaspoon salt
8 tablepsoons unsalted butter, at room temperature
1 cup light brown sugar, packed
1 large egg
1 teaspoon vanilla extract
½ cup buttermilk, at room temperature
1 oz. red food coloring 

Frosting
8 oz. cream cheese
5 tbsp. unsalted butter, at room temperature
2 tsp. vanilla extract
2½ cups confectioners’ sugar

Directions
1) Preheat the oven to 375˚ F.
2) In a medium bowl, whisk together the flour, cocoa powder, baking powder and salt.
3) In the bowl of a stand mixer fitted with the paddle attachment, cream together the butter and brown sugar on medium-high speed until light and fluffy, about 2 minutes.
4) Beat in the egg until incorporated, scraping down the sides of the bowl as necessary.  Blend in the vanilla.
5) With the mixer on low speed, beat in about a third of the dry ingredients, followed by half of the buttermilk, beating each addition just until incorporated.  Repeat so that all the buttermilk has been added and then mix in the final third of dry ingredients.  Do not overbeat.
6) Blend in the food coloring.
7) For the frosting: In the bowl of a stand mixer fitted with the paddle attachment beat the cream cheese and butter on medium-high speed until well combined and smooth, about 2-3 minutes.  Mix in the vanilla extract.
8) Gradually beat in the confectioners’ sugar until totally incorporated, increase the speed and then beat until smooth.
9) When cookies cool, frost and enjoy.


Jacob really loved these cookies.  He said they flew off the table at his office and his office mates wished there were more.  He sat at the mixing bowl and ate the extra frosting that wasn't used on the cookies.  I think all in all, they were probably just as great as the whoopie pies would have been.

Wednesday, August 29, 2012

Peanut Butter Cookies

I love recipes where you read them, think they sound good, and find out you have all the ingredients.  I guess that could be considered one of those life surprises when things work out when you weren't expecting it to.  The day that Amy, The Nifty Foodie posted these, I realized I hadn't had Peanut Butter Cookies in a long time and they sounded fantastic, and lo and behold I had all the ingredients.

Peanut Butter Cookies
slightly adapted from The Nifty Foodie
Ingredients
1/3 cup vegetable shortening
1/2 cup granulated sugar
1/2 cup packed light brown sugar
1 large egg
1 teaspoon vanilla extract
3/4 cup smooth peanut butter
1 1/2 cups all purpose flour
1 teaspoon baking soda
1/2 teaspoon salt
1 tablespoon sugar for topping

Directions
1) Preheat your oven to 350 degrees.  Line two baking sheets with parchment paper or a silicone mat.
2) In a mixing bowl, combine the shortening, sugars, egg, vanilla, and peanut butter until the mixture is smooth.
3) Scrape down the bowl, and add the flour, baking soda, and salt to the wet mixture.  Beat slowly until dough is just combined.  This is a dry dough, so it could take awhile to mix.  If the dough seems too crumbly, add a little water at a time until the dough is no longer crumbly.
4) Using a scoop, drop the cookie dough onto your baking sheet, leaving 2 inches between each cookie. 
5) Take a fork and flatten the cookie to a 1/2 inch thickness, making a cross-hatch type of design.
6) Sprinkle the top of each cookie with a few granules of sugar.
7) Bake the cookies 12-16 minutes, until they just start to brown around the edges.  The tops will not brown at this point. 


My husband absolutely loved these cookies.  My first batch was definitely a little too crumbly and came out with a lot of cracks, so I added about a teaspoon of water, and the second batch came out perfectly.