This month I was the host of the What's Baking recipe challenge. I chose Christmas traditions (savory or sweet) because I love to see all the different traditions from family to family. When I was a kid, I thought everyone celebrated the same way we did, and as I grew up I found that it seems like everyone had slightly different traditions than I did.
I apologize to the group for not participating this month. I thought I would be able to get something made either while on vacation or immediately when I got back, but driving 16 hours alone in the car took more of a toll on me than I thought it would. Please enjoy looking at the recipes the two participants chose to make and read more about their family's traditions:
Amanda from Our Italian Kitchen, made Christmas Sugar Cookies with Glazed Icing. Her and her family gather every year and make cookies and this is a recipe that she likes to make.
Ange, from The Tiny Tyrant's Kitchen, made Ricotta Cookies. Every year, she makes a ton of Christmas cookies and this year she decided to try a cookie she loves but has never made herself.
Thanks for participating in this month's What's Baking Challenge Amanda and Ange. I had fun reading about your traditions, and both cookies look delicious!
Showing posts with label What's Baking. Show all posts
Saturday, January 4, 2014
Sunday, April 28, 2013
Cream Cheese Meltaways
When I was a kid, I'd lose stuff and then have difficulty finding it again. My dad was in the military, and the ID card that they give everyone was always the first thing to disappear. My parents used to say, "It will always be the last place you look."
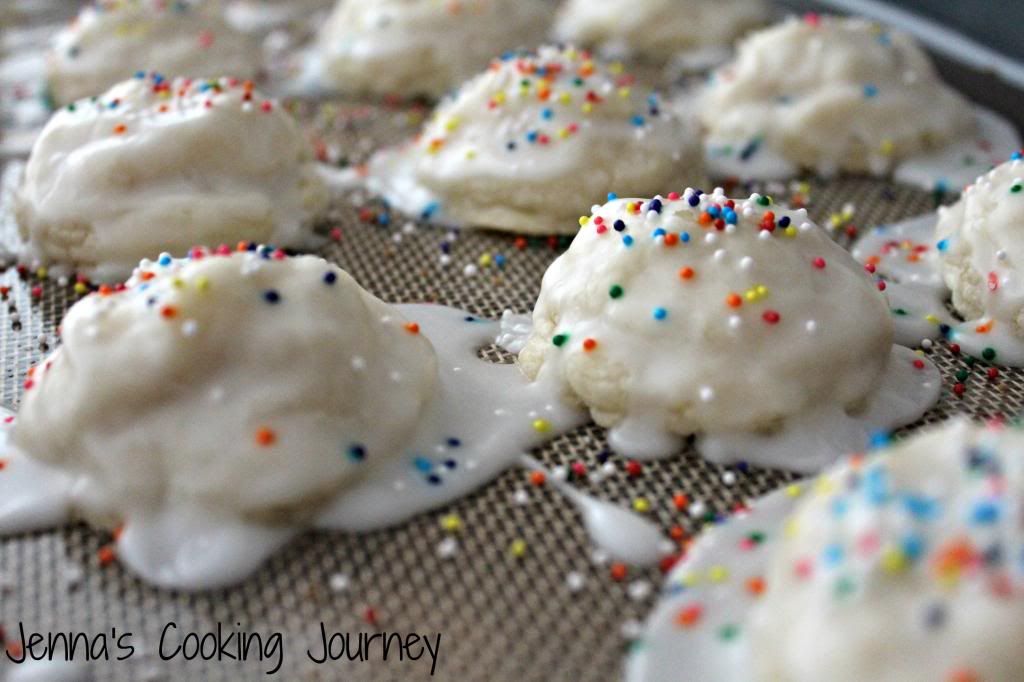
I felt very much that way for this baking challenge, for which Amanda from Our Italian Kitchen chose mini/bite sized treats. Everything I found was delicious looking truffles, and I couldn't find anything that I actually had to bake. I was so stuck on the truffle idea that I had almost given up, until I found these Cream Cheese Meltaways at Alida's Kitchen. I found what I was looking for in the last place I looked.
Cream Cheese Meltaways
from Alida's Kitchen
Ingredients
1 1/4 cups all-purpose flour
1/2 cup cornstarch
1/8 teaspoon salt
1 cup powdered sugar
1/2 cup butter, softened
2 ounces cream cheese
1 teaspoon vanilla
Glaze
1 3/4 cups powdered sugar
1/4 cup fresh lemon juice
assorted sprinkles, for decorating (optional)
Directions:
1) Preheat oven to 375 degrees. Line cookie sheets with parchment paper and set aside.
2) In a medium bowl, whisk flour, cornstarch and salt until combined.
3) In a large bowl, add powdered sugar, butter, cream cheese and vanilla and beat at medium speed until light and fluffy.
4) Add flour mixture to butter mixture, stirring until combined. (Note: dough will be dry and crumbly).
5) Shape dough into 1-inch balls (be careful not to overwork dough) and place on prepared cookie sheets.
6) Bake for 8 to 10 minutes, or until bottoms of cookies are lightly browned. Cool 5 minutes of pan and then move to wire rack to cool completely.
Glaze: In a medium bowl, whisk powdered sugar and lemon juice until smooth. Dip the tops of cooled cookies into glaze and place on wire rack. Decorate with sprinkles, as desired. Let cookies stand until glaze is set.
I have to admit that I thought these cookies were more addicting without the glaze. To me the glaze tasted better after it had awhile to sit, but I still think they were better without. These were slightly bigger than bite sized for me, but I definitely could have made them smaller too. I only yielded 20 cookies, while Alida said the recipe makes 36. These are fantastic cookies, and I'm glad I ran across them for the challenge.
I felt very much that way for this baking challenge, for which Amanda from Our Italian Kitchen chose mini/bite sized treats. Everything I found was delicious looking truffles, and I couldn't find anything that I actually had to bake. I was so stuck on the truffle idea that I had almost given up, until I found these Cream Cheese Meltaways at Alida's Kitchen. I found what I was looking for in the last place I looked.
Cream Cheese Meltaways
from Alida's Kitchen
Ingredients
1 1/4 cups all-purpose flour
1/2 cup cornstarch
1/8 teaspoon salt
1 cup powdered sugar
1/2 cup butter, softened
2 ounces cream cheese
1 teaspoon vanilla
Glaze
1 3/4 cups powdered sugar
1/4 cup fresh lemon juice
assorted sprinkles, for decorating (optional)
Directions:
1) Preheat oven to 375 degrees. Line cookie sheets with parchment paper and set aside.
2) In a medium bowl, whisk flour, cornstarch and salt until combined.
3) In a large bowl, add powdered sugar, butter, cream cheese and vanilla and beat at medium speed until light and fluffy.
4) Add flour mixture to butter mixture, stirring until combined. (Note: dough will be dry and crumbly).
5) Shape dough into 1-inch balls (be careful not to overwork dough) and place on prepared cookie sheets.
6) Bake for 8 to 10 minutes, or until bottoms of cookies are lightly browned. Cool 5 minutes of pan and then move to wire rack to cool completely.
Glaze: In a medium bowl, whisk powdered sugar and lemon juice until smooth. Dip the tops of cooled cookies into glaze and place on wire rack. Decorate with sprinkles, as desired. Let cookies stand until glaze is set.
I have to admit that I thought these cookies were more addicting without the glaze. To me the glaze tasted better after it had awhile to sit, but I still think they were better without. These were slightly bigger than bite sized for me, but I definitely could have made them smaller too. I only yielded 20 cookies, while Alida said the recipe makes 36. These are fantastic cookies, and I'm glad I ran across them for the challenge.
Tuesday, March 26, 2013
S'More Peanut Butter Cookies
This month's What's Baking Challenge is hosted by Beantown Baker. She chose sprinkles as this month's theme. Stop by her blog in a few days to see her round up of what everyone made this month.
I have to admit that I see sprinkles on about the same level that I see glitter. They just get EVERYWHERE when you're trying to use them. While it makes your stuff pretty, it usually isn't worth the hassle of cleaning little beads up for the next few months.
Since sprinkles are something that I loved as a kid...I decided to try to find something to bake that reminded me of being a kid. While searching, I found these S'More Peanut Butter Cookies. I LOVED S'Mores when I was a kid. So why not combine s'mores with sprinkles and have the most fun cookies around.
S'More Peanut Butter Cookies
as seen on Sally's Baking Addiction
Ingredients
I have to admit that I see sprinkles on about the same level that I see glitter. They just get EVERYWHERE when you're trying to use them. While it makes your stuff pretty, it usually isn't worth the hassle of cleaning little beads up for the next few months.
Since sprinkles are something that I loved as a kid...I decided to try to find something to bake that reminded me of being a kid. While searching, I found these S'More Peanut Butter Cookies. I LOVED S'Mores when I was a kid. So why not combine s'mores with sprinkles and have the most fun cookies around.
S'More Peanut Butter Cookies
as seen on Sally's Baking Addiction
Ingredients
1/2 cup (1 stick) salted butter, softened to room temperature
1/2 cup light brown sugar
1/4 cup sugar
1 egg
3/4 cup creamy peanut butter
1 tsp vanilla extract
1/2 tsp baking soda
1 and 1/4 cups all purpose flour
12 large marshmallows, cut in half
8 oz melting chocolate (such as Baker's)
sprinkles
Directions
1) In a large bowl, using a hand-held mixer or stand mixer with paddle attachment, cream the butter and sugars together on medium speed. Mix in the peanut butter, egg, and vanilla (in that order). Scrape down the sides as needed. Slowly mix in the baking soda and flour. Do not overmix. Chill the dough for at least 30 minutes.
2) Roll 1.5 Tablespoons of dough into a ball. Place onto ungreased cookie sheet or silicone baking mat. Bake for 7 minutes.
3) Remove from oven and place marshmallow on top, gently pressing it down into the warm cookie. Place back into the oven for 2-3 more minutes so the marshmallow can melt and the cookie can finish baking.
4) Remove from oven and allow to cool for about 5 minutes.
5) As the cookies cool, melt chocolate according to package directions. Spoon about two teaspoons of chocolate on top of each marshmallow and swirl around with the back of the teaspoon. Top with sprinkles.
The only complaint that I have about these cookies is that some of the marshmallows completely disintegrated under the chocolate. The majority of them looked great, but some of them fell completely apart. Taste wise these aren't exactly like S'Mores, but they're so delicious. I actually love the little crunches that the sprinkles provide in the chocolate. It is a great contrast to the puff of the marshmallow and the soft peanut butter cookie. During this challenge, I learned that sprinkles aren't as bad as I thought they were...although a lot of them got all over my oven. I'll have to play more with the rest of the bottle that I have.
Thanks Jen for a great challenge!
Monday, January 28, 2013
Banana Oatmeal Cups with Chocolate Chips
It's time for another What's Baking Challenge, and the theme this month is Baking Healthier from Catherine at Pursuing Domestic Godess-ness.
I am a yo-yo exerciser. I'm really good for a few months, and then working out doesn't seem like fun anymore, so I stop. In turn, my weight also yo-yos. I am back in the working out really good phase right now. I am finally getting into jogging, thanks to the Couch to 5K program, and when the bitter cold sinks in, I've been doing Jillian Michael's 30 Day Shred.
I recently heard on the Biggest Loser that one of the problems with overweight people is that the majority of them skip breakfast. This is something that I used to do a lot, so I understand it. So, when approaching this challenge, my first thought was to find a healthy breakfast that I could make on Sunday, pop in a plastic bag, and eat all week when I got to work: enter Banana Oatmeal Cups with Chocolate Chips.
Banana Oatmeal Cups with Chocolate Chips
from Green Lite Bites
Ingredients
2) Mix all ingredients except the chocolate chips together, and let sit while you prepare the muffin pans.
3) Spray a muffin pan and/or liners with with non-stick spray.
4) Stir the chocolate chips into the oatmeal batter.
5) Divide batter into 15 muffin cups. They should be just about filled, these don't rise much, so it is okay to fill them all the way.
6) Bake 25 minutes, you’ll see the edges just starting to brown and they will be firm to the touch.
I thought these were great. I am not a huge banana fan, but I think they worked well in these. I think the banana and the chocolate provide just enough sugar to make these good, although if you like sweeter things, you may want to add just a little sugar into the mix. These were a great breakfast and kept me full all the way up until lunch.
I do have to confess that Jacob isn't a fan of these. He thinks that the oatmeal stayed too crunchy, and he is a huge breakfast oatmeal fan, so he likes a mushier oatmeal texture. I thought the inside oatmeal was softer while the outside was crunchier, providing a nice contrast. But, I can't force him to see the cups my way...so more for me!
Please check out Catherine's blog (Pursuing Domestic Godess-ness) at the beginning of February to see a list of what all the other participants made.
I am a yo-yo exerciser. I'm really good for a few months, and then working out doesn't seem like fun anymore, so I stop. In turn, my weight also yo-yos. I am back in the working out really good phase right now. I am finally getting into jogging, thanks to the Couch to 5K program, and when the bitter cold sinks in, I've been doing Jillian Michael's 30 Day Shred.
I recently heard on the Biggest Loser that one of the problems with overweight people is that the majority of them skip breakfast. This is something that I used to do a lot, so I understand it. So, when approaching this challenge, my first thought was to find a healthy breakfast that I could make on Sunday, pop in a plastic bag, and eat all week when I got to work: enter Banana Oatmeal Cups with Chocolate Chips.
Banana Oatmeal Cups with Chocolate Chips
from Green Lite Bites
Ingredients
3 mashed bananas
1 cup vanilla Almond milk
2 eggs
1 tablespoon Baking powder
3 cups Old Fashion or Rolled Oats
1 teaspoon vanilla extract
3 tablespoons mini chocolate chips
Directions
1) Preheat oven to 375 degrees2) Mix all ingredients except the chocolate chips together, and let sit while you prepare the muffin pans.
3) Spray a muffin pan and/or liners with with non-stick spray.
4) Stir the chocolate chips into the oatmeal batter.
5) Divide batter into 15 muffin cups. They should be just about filled, these don't rise much, so it is okay to fill them all the way.
6) Bake 25 minutes, you’ll see the edges just starting to brown and they will be firm to the touch.
I thought these were great. I am not a huge banana fan, but I think they worked well in these. I think the banana and the chocolate provide just enough sugar to make these good, although if you like sweeter things, you may want to add just a little sugar into the mix. These were a great breakfast and kept me full all the way up until lunch.
I do have to confess that Jacob isn't a fan of these. He thinks that the oatmeal stayed too crunchy, and he is a huge breakfast oatmeal fan, so he likes a mushier oatmeal texture. I thought the inside oatmeal was softer while the outside was crunchier, providing a nice contrast. But, I can't force him to see the cups my way...so more for me!
Please check out Catherine's blog (Pursuing Domestic Godess-ness) at the beginning of February to see a list of what all the other participants made.
Tuesday, December 25, 2012
Peppermint Bark Surprise Cupcakes
Carrie from Carrie's Sweet Life, is the host of this month's What's Baking Challenge, and the theme was Peppermint.
Last year, I discovered the Ghirardelli Peppermint Bark Squares and they were the first thing that I bought this year when I deemed it to be Christmas time. They are so creamy with just the right amount of peppermint flavor that they are super addictive. So, when I heard the challenge, I immediately was wondering if I could make something using those peppermint squares. I found a recipe that hit the jackpot.
Peppermint Bark Surprise Cupcakes
from the Collegiate Baker
Ingredients
1 package of Ghirardelli Peppermint Bark Squares
1 cup + 2 tablespoons all purpose flour
1/2 cup cocoa powder
1 tsp baking soda
1 cup + 2 tablespoons sugar
1 egg
1/2 cup oil
1/2 cup milk
1/2 teaspoon vanilla
Directions
1) Preheat the oven to 350 degrees and line a cupcake pan with paper liners.
2) Unwrap 10 of the peppermint bark squares and cut off the corners. (They aren't exactly the right size for to fit in cupcake pans, but they're pretty close.) Put the peppermint bark squares/octagons aside.
3) In a small-medium sized bowl, combine the dry ingredients: the flour, cocoa powder, and baking soda. Whisk them together.
4) In another medium sized bowl, combine the sugar, egg, oil, milk, and vanilla. Mix well.
5) When you put the batter in the first paper liner, make sure you put enough in to completely cover the bottom. Fill the liner up about halfway, maybe a little less, and then put in a peppermint bark square. Cover it with cake batter until the liner is about 2/3 full. Repeat until all the other lines are full.
6) Bake for about 25-30 minutes. Test the top part of the cupcake for done-ness, but don't go too far down or you'll hit the peppermint bark.
1 tablespoon milk
1/2 teaspoon peppermint extract
1 cup powdered sugar
Directions
3) Test the frosting to see if it's the right consistency. If it's too thin, add 1/2 cup powdered sugar. If it's too thick, add another tablespoon of milk.
4) Decorate cupcakes with frosting. You can use the corners from the squares to decorate...if you haven't eaten them by this point.
I made these twice and the first time was a failure. I baked them for the 15 minutes The Collegiate Baker said in her instructions and when I tested them, they seemed like they were done, but as they were cooling, they totally collapsed on themselves because the centers weren't done.
The second time, I left them in for a long time. I left them in closer to 30 minutes because that was when my toothpick came out completely clean. With the peppermint in the frosting, I think you lose the surprise element in these cupcakes, but I still think they are delicious. I think it would be good to incorporate the corner leftovers into the frosting instead of putting in peppermint extract. I made these for Christmas and couldn't keep my hands off them. Definitely a great holiday treat.
Last year, I discovered the Ghirardelli Peppermint Bark Squares and they were the first thing that I bought this year when I deemed it to be Christmas time. They are so creamy with just the right amount of peppermint flavor that they are super addictive. So, when I heard the challenge, I immediately was wondering if I could make something using those peppermint squares. I found a recipe that hit the jackpot.
Peppermint Bark Surprise Cupcakes
from the Collegiate Baker
Ingredients
1 package of Ghirardelli Peppermint Bark Squares
1 cup + 2 tablespoons all purpose flour
1/2 cup cocoa powder
1 tsp baking soda
1 cup + 2 tablespoons sugar
1 egg
1/2 cup oil
1/2 cup milk
1/2 teaspoon vanilla
Directions
1) Preheat the oven to 350 degrees and line a cupcake pan with paper liners.
2) Unwrap 10 of the peppermint bark squares and cut off the corners. (They aren't exactly the right size for to fit in cupcake pans, but they're pretty close.) Put the peppermint bark squares/octagons aside.
3) In a small-medium sized bowl, combine the dry ingredients: the flour, cocoa powder, and baking soda. Whisk them together.
4) In another medium sized bowl, combine the sugar, egg, oil, milk, and vanilla. Mix well.
5) When you put the batter in the first paper liner, make sure you put enough in to completely cover the bottom. Fill the liner up about halfway, maybe a little less, and then put in a peppermint bark square. Cover it with cake batter until the liner is about 2/3 full. Repeat until all the other lines are full.
6) Bake for about 25-30 minutes. Test the top part of the cupcake for done-ness, but don't go too far down or you'll hit the peppermint bark.
Peppermint Buttercream Frosting
1/2 cup (1 stick) unsalted butter, room temperature1 tablespoon milk
1/2 teaspoon peppermint extract
1 cup powdered sugar
Directions
1) In the bowl of a stand mixer, or a medium sized bowl with a hand mixer, beat
butter on medium-high speed until smooth and creamy.
2) Add milk, peppermint extract, and the powdered sugar. Mix until
everything is incorporated.
3) Test the frosting to see if it's the right consistency. If it's too thin, add 1/2 cup powdered sugar. If it's too thick, add another tablespoon of milk.
4) Decorate cupcakes with frosting. You can use the corners from the squares to decorate...if you haven't eaten them by this point.
I made these twice and the first time was a failure. I baked them for the 15 minutes The Collegiate Baker said in her instructions and when I tested them, they seemed like they were done, but as they were cooling, they totally collapsed on themselves because the centers weren't done.
The second time, I left them in for a long time. I left them in closer to 30 minutes because that was when my toothpick came out completely clean. With the peppermint in the frosting, I think you lose the surprise element in these cupcakes, but I still think they are delicious. I think it would be good to incorporate the corner leftovers into the frosting instead of putting in peppermint extract. I made these for Christmas and couldn't keep my hands off them. Definitely a great holiday treat.
Sunday, November 25, 2012
Blueberry Cheesecake Pie
Kim, the author of Just Baked, chose a pie theme for this month's What's Baking challenge. Last year, I made a cheesecake for a holiday get together. Everyone loved it and said they liked having an option that wasn't so traditional for the holidays.
Part of what I like about the challenges is that I spend a lot of time looking through other people's blogs that I haven't ever looked at or haven't visited in awhile. I found this recipe on Mel's Kitchen Cafe. Just reading her descriptions and seeing her pictures, had me hooked on this recipe. Mel's Kitchen Cafe has some great recipes, so drop by her blog and check out other recipes like blue cheese and cheddar scalloped potatoes and Cuban street tacos.
Blueberry Cheesecake Pie
from Mel's Kitchen Cafe
Ingredients
For the Crumb Crust:9 large rectangular graham crackers (around 1 1/2 cups), crushed
2 tablespoons sugar
6 tablespoons melted butter
For the Cheese Custard:
8 oz. cream cheese, softened
1/3 cup sugar
1 teaspoon vanilla extract
2 eggs
For the Berries:
2 cups blueberries, rinsed
½ cup water
1/3 cup sugar
1 ½ tablespoons cornstarch mixed with 2 tablespoons cold water
Directions
1) Preheat the oven to 325 degrees.
2) In a small bowl, combine the crushed graham crackers, sugar and butter. Pat the crumb mixture into a 9-inch pie pan and bake for 8 minutes, until very lightly browned and set. Let the crust cool completely before filling. Leave the oven on.
3) In a medium bowl, combine the cream cheese, sugar, and vanilla and beat until thoroughly mixed and smooth. Add the eggs and beat well.
4) Pour into the cooled shell and bake until just set, 25-30 minutes. Remove from the oven and let cool completely.
5) While the cheesecake is baking, combine the berries, water, and sugar in a medium saucepan and bring to a boil. Reduce the heat and simmer, covered, for 5 minutes, stirring once or twice to prevent sticking. Remove from the heat and add the cornstarch mixture. Return to a boil and cook for one minute, stirring constantly, until the mixture is thickened. Remove from the heat and cool until lukewarm.
6) Spoon the berries over the custard. Chill for at least one hour before serving.
This pie was really easy to make and very delicious as well. I have never made a berry mixture to go on top of a dessert, and I learned that it is super easy. This pie isn't very heavy, so it'd be a great dessert for a holiday with lots of heavy fare. I'm glad that I continued the cheesecake "tradition" and look forward to next year's cheesecake.
Check out Kim's blog at the beginning of December to see the roundup of great pies!
Part of what I like about the challenges is that I spend a lot of time looking through other people's blogs that I haven't ever looked at or haven't visited in awhile. I found this recipe on Mel's Kitchen Cafe. Just reading her descriptions and seeing her pictures, had me hooked on this recipe. Mel's Kitchen Cafe has some great recipes, so drop by her blog and check out other recipes like blue cheese and cheddar scalloped potatoes and Cuban street tacos.
Blueberry Cheesecake Pie
from Mel's Kitchen Cafe
Ingredients
For the Crumb Crust:9 large rectangular graham crackers (around 1 1/2 cups), crushed
2 tablespoons sugar
6 tablespoons melted butter
For the Cheese Custard:
8 oz. cream cheese, softened
1/3 cup sugar
1 teaspoon vanilla extract
2 eggs
For the Berries:
2 cups blueberries, rinsed
½ cup water
1/3 cup sugar
1 ½ tablespoons cornstarch mixed with 2 tablespoons cold water
Directions
1) Preheat the oven to 325 degrees.
2) In a small bowl, combine the crushed graham crackers, sugar and butter. Pat the crumb mixture into a 9-inch pie pan and bake for 8 minutes, until very lightly browned and set. Let the crust cool completely before filling. Leave the oven on.
3) In a medium bowl, combine the cream cheese, sugar, and vanilla and beat until thoroughly mixed and smooth. Add the eggs and beat well.
4) Pour into the cooled shell and bake until just set, 25-30 minutes. Remove from the oven and let cool completely.
5) While the cheesecake is baking, combine the berries, water, and sugar in a medium saucepan and bring to a boil. Reduce the heat and simmer, covered, for 5 minutes, stirring once or twice to prevent sticking. Remove from the heat and add the cornstarch mixture. Return to a boil and cook for one minute, stirring constantly, until the mixture is thickened. Remove from the heat and cool until lukewarm.
6) Spoon the berries over the custard. Chill for at least one hour before serving.
This pie was really easy to make and very delicious as well. I have never made a berry mixture to go on top of a dessert, and I learned that it is super easy. This pie isn't very heavy, so it'd be a great dessert for a holiday with lots of heavy fare. I'm glad that I continued the cheesecake "tradition" and look forward to next year's cheesecake.
Check out Kim's blog at the beginning of December to see the roundup of great pies!
Saturday, October 27, 2012
Pumpkin Scones
In Wyoming, there really wasn't a fall. We really went from summer to winter. New Jersey definitely has a fall though. The leaves changing from green to a beautiful red and yellow. It is amazing and I'm now obsessed with fall here.
The one thing that fall has made me want to do is utilize pumpkin in dishes. I keep talking about pumpkin chili, pumpkin tortellini alfredo, pumpkin pie ice cream, and pumpkin doughnuts. When I found out the theme for What's Baking this month was Pumpkin/Sweet Potatoes, my mind went crazy. Eva from Eva Bakes chose a great theme. Head over to her blog around the first of the month to see what everyone else baked.
Towards the end of the month, I ran across these scones. Scones have been on my cooking bucket list for awhile, so I figured I should try to conquer them. I think this was a great month to try something new...and delicious.
Pumpkin Scones
from Iowa Girl Eats
Ingredients
2 cups all-purpose flour
7 tablespoons sugar
1 tablespoon baking powder
1/2 teaspoon salt
1/2 teaspoon cinnamon
1/2 teaspoon ground nutmeg
1/4 teaspoon ground cloves
1/4 teaspoon ground ginger
1/2 cup canned pumpkin puree (not pumpkin pie filling)
3 tablespoons half & half
1 egg
6 tablespoons cold butter, cubed
For the plain glaze:
1 cup + 1 tablespoon powdered sugar
2 tablespoons half & half
For the spiced drizzle:
1 cup + 3 tablespoons powdered sugar
2 tablespoons half & half
1/4 teaspoon cinnamon
1/8 teaspoon ground nutmeg
pinch ground ground ginger
pinch ground ground cloves
Directions
1) Preheat oven to 425 degrees then line a baking sheet with parchment paper and set aside.
2) In the bowl of a large food processor combine the flour, sugar, baking powder, salt, cinnamon, nutmeg, cloves, and ginger. Pulse to combine. Add cold butter and pulse until well incorporated and mixture is the texture of cornmeal.
3) In a separate bowl, whisk together pumpkin puree, half & half, and egg. Add to flour mixture and pulse until just combined.
4) Turn the dough out onto a lightly floured surface and gently knead 4 or 5 times to bring the dough together, then flatten into a circle 1″ thick. Using a pizza cutter, cut the dough in half, then cut each half into thirds.
5) Place the wedges onto the prepared baking sheet and bake for 14-16 minutes, or until just starting to turn golden brown. Remove to a cooling rack to cool completely.
6) When scones are cool, whisk together the plain glaze ingredients, then spoon on top and spread slightly. Let harden for 10 minutes, then whisk together the spiced drizzle ingredients and drizzle on top. Let harden completely, about 1 hour, before serving. Store in an air-tight container for 1 day.
I thought these were absolutely fantastic. I think they had great pumpkin flavor without it being too overwhelming. I think that adding chocolate chips would make them even more special. I sprinkled cinnamon on the top of ours for just a little more punch of cinnamon. If you haven't ever made scones but have been thinking about trying them, I highly recommend trying this recipe. It is easy, delicious, and they are addicting.
The one thing that fall has made me want to do is utilize pumpkin in dishes. I keep talking about pumpkin chili, pumpkin tortellini alfredo, pumpkin pie ice cream, and pumpkin doughnuts. When I found out the theme for What's Baking this month was Pumpkin/Sweet Potatoes, my mind went crazy. Eva from Eva Bakes chose a great theme. Head over to her blog around the first of the month to see what everyone else baked.
Towards the end of the month, I ran across these scones. Scones have been on my cooking bucket list for awhile, so I figured I should try to conquer them. I think this was a great month to try something new...and delicious.
Pumpkin Scones
from Iowa Girl Eats
Ingredients
2 cups all-purpose flour
7 tablespoons sugar
1 tablespoon baking powder
1/2 teaspoon salt
1/2 teaspoon cinnamon
1/2 teaspoon ground nutmeg
1/4 teaspoon ground cloves
1/4 teaspoon ground ginger
1/2 cup canned pumpkin puree (not pumpkin pie filling)
3 tablespoons half & half
1 egg
6 tablespoons cold butter, cubed
For the plain glaze:
1 cup + 1 tablespoon powdered sugar
2 tablespoons half & half
For the spiced drizzle:
1 cup + 3 tablespoons powdered sugar
2 tablespoons half & half
1/4 teaspoon cinnamon
1/8 teaspoon ground nutmeg
pinch ground ground ginger
pinch ground ground cloves
Directions
1) Preheat oven to 425 degrees then line a baking sheet with parchment paper and set aside.
2) In the bowl of a large food processor combine the flour, sugar, baking powder, salt, cinnamon, nutmeg, cloves, and ginger. Pulse to combine. Add cold butter and pulse until well incorporated and mixture is the texture of cornmeal.
3) In a separate bowl, whisk together pumpkin puree, half & half, and egg. Add to flour mixture and pulse until just combined.
4) Turn the dough out onto a lightly floured surface and gently knead 4 or 5 times to bring the dough together, then flatten into a circle 1″ thick. Using a pizza cutter, cut the dough in half, then cut each half into thirds.
5) Place the wedges onto the prepared baking sheet and bake for 14-16 minutes, or until just starting to turn golden brown. Remove to a cooling rack to cool completely.
6) When scones are cool, whisk together the plain glaze ingredients, then spoon on top and spread slightly. Let harden for 10 minutes, then whisk together the spiced drizzle ingredients and drizzle on top. Let harden completely, about 1 hour, before serving. Store in an air-tight container for 1 day.
I thought these were absolutely fantastic. I think they had great pumpkin flavor without it being too overwhelming. I think that adding chocolate chips would make them even more special. I sprinkled cinnamon on the top of ours for just a little more punch of cinnamon. If you haven't ever made scones but have been thinking about trying them, I highly recommend trying this recipe. It is easy, delicious, and they are addicting.
Monday, October 1, 2012
What's Baking Challenge Roundup: Quickbreads
This was my month to host the What's Baking Challenge. I chose the theme Quickbreads. I thought it would be a great opening to fall and the slightly chillier temperatures that come with the new season. I think the participants came up with some delicious combinations, so check out all the posts below.
I embraced my love for lemon cakes and made a Lemon Poppyseed Loaf.
Melissa from I Was Born To Cook made Easy Pumpkin Chocolate Chip Bread, which was a huge hit with her little girl, Bella.
Yudith from Blissfully Delicious made Sweet Potato Bread using some extra sweet potatoes in her house to turn into this delicious quickbread.
Ange from The Tiny Tyrant's Kitchen made Beer Bread using a recipe she found on Pinterest, and it turned out great.
Heather from Hezzi D's Books and Cooks made Pumpkin Spice bread and Strawberry bread to give to her friend who had recently had a baby.
Eva from Eva Bakes made Cinnamon Zucchini Bread using the last of the zucchini that she had at her house.
Jaida from Sweet Beginnings made a Chocolate Orange Loaf which she said reminds her of the Chocolate Oranges you find around the holiday season.
Steph from Brownies and Blondies took advantage of her last of her CSA fruit box and made Peach Bread.
Carrie from Carrie's Sweet Life asked her Facebook followers what bread she should make and selected Chocolate Chip Apple Bread from the responses.
Cara from The Boys Made Me Do It embraced the start of fall by making Ginger Pumpkin Bread.
Nicole from Seven Ate Nine combined family favorites to make Jalapeno Cheddar Beer Bread.
Catherine from Pursuing Domestic Goddess-ness made a Harvest Pumpkin bread that she received from a recipe swap.
Ammie from Adventures in My Kitchen paired her Beer Bread with a vegetable soup for a perfect autumn meal.
Jen from Beantown Baker shared her Banana Coconut Bread with her coworkers who thought the bread was "exquisite".
Hopefully you've found some inspiration for your next quickbread creation.
Next month's challenge is being hosted by Eva from Eva Bakes, and the theme is Pumkin/Sweet Potatoes. Check out her blog at the end of the month to see what everyone makes!
I embraced my love for lemon cakes and made a Lemon Poppyseed Loaf.
Melissa from I Was Born To Cook made Easy Pumpkin Chocolate Chip Bread, which was a huge hit with her little girl, Bella.
Yudith from Blissfully Delicious made Sweet Potato Bread using some extra sweet potatoes in her house to turn into this delicious quickbread.
Ange from The Tiny Tyrant's Kitchen made Beer Bread using a recipe she found on Pinterest, and it turned out great.
Heather from Hezzi D's Books and Cooks made Pumpkin Spice bread and Strawberry bread to give to her friend who had recently had a baby.
Eva from Eva Bakes made Cinnamon Zucchini Bread using the last of the zucchini that she had at her house.
Jaida from Sweet Beginnings made a Chocolate Orange Loaf which she said reminds her of the Chocolate Oranges you find around the holiday season.
Steph from Brownies and Blondies took advantage of her last of her CSA fruit box and made Peach Bread.
Carrie from Carrie's Sweet Life asked her Facebook followers what bread she should make and selected Chocolate Chip Apple Bread from the responses.
Cara from The Boys Made Me Do It embraced the start of fall by making Ginger Pumpkin Bread.
Kim from Just Baked made Beer Cheese bread because her husband isn't big on sweets but does love beer and cheese.
Joanna from Newlywed and Newly Cooking took her Honey Cake to a family gathering and it was a hit.
Catherine from Pursuing Domestic Goddess-ness made a Harvest Pumpkin bread that she received from a recipe swap.
Ammie from Adventures in My Kitchen paired her Beer Bread with a vegetable soup for a perfect autumn meal.
Jen from Beantown Baker shared her Banana Coconut Bread with her coworkers who thought the bread was "exquisite".
Hopefully you've found some inspiration for your next quickbread creation.
Next month's challenge is being hosted by Eva from Eva Bakes, and the theme is Pumkin/Sweet Potatoes. Check out her blog at the end of the month to see what everyone makes!
Friday, September 28, 2012
What's Baking: Lemon Poppyseed Loaf
It was my time to host the What's Baking Challenge this month. The girls in this swap usually come up with some really good themes, and I am not creative at all. The one thing that I thought of was that in cooler weather, I love quickbreads. I have made several banana quickbreads lately. While they turned out fantastic, especially the Nutella Banana Bread that I tried, I decided to try something else.
I love lemon cakes. When we're in the store and I see lemon cake of any kind, I always say that I'm going to go home and make a lemon poppyseed bread, but then never do. I usually eat the loaves alone, so I try not to tempt myself too badly. I decided to break down and finally make my lemon poppyseed loaf, especially since no one else made anything similar.
Lemon Poppyseed Loaf
barely adapted from StoneGable
Ingredients
3 tablespoons milk
I love lemon cakes. When we're in the store and I see lemon cake of any kind, I always say that I'm going to go home and make a lemon poppyseed bread, but then never do. I usually eat the loaves alone, so I try not to tempt myself too badly. I decided to break down and finally make my lemon poppyseed loaf, especially since no one else made anything similar.
Lemon Poppyseed Loaf
barely adapted from StoneGable
Ingredients
3 tablespoons milk
3 large eggs
1 1/2 teaspoons vanilla
1 1/2 cups cake flour
1 cup sugar, divided
3/4 teaspoon baking powder
1/4 teaspoon salt
1 tablespoon loosely packed grated lemon zest (~5 lemons)
2 1/2 tablespoons poppy seeds
12 tablespoons unsalted butter, softened
1/8 cup freshly squeezed lemon juice (~2 lemons)
Directions
1) Preheat oven to 350 degrees. Grease large loaf pan.
2) In a small bowl mix together milk, eggs and vanilla.
3) In a large bowl of a mixer, mix together flour, 2/3 cup sugar, baking powder, salt, lemon zest and poppy seeds on low speed for 30 seconds.
4) Add all of the softened butter and 1/2 of the egg mixture. Mix on low speed for 30 seconds increasing speed to medium and mix for another 30 seconds. Add the rest of the egg mixtures in 2 parts mixing for 20 seconds in between.
5) Pour batter into the loaf pan and bake for 50-55 minutes until an inserted toothpick comes out clean.
6) Put 1/3 cup sugar and 1/4 cup lemon in a saucepan and cook until sugar dissolves.
5) Pour batter into the loaf pan and bake for 50-55 minutes until an inserted toothpick comes out clean.
6) Put 1/3 cup sugar and 1/4 cup lemon in a saucepan and cook until sugar dissolves.
7) When pound cake is done, poke holes over the top of the cake with a skewer. Brush glaze over cake.
I may be biased because I love lemon cakes, but I thought this was a good recipe. I baked it about five minutes too long and it came out a little on the dry side, so I adjusted for the time difference in the directions. The glaze made the cake moist and even more flavorful. I wish there was a little more lemon flavor in the actual cake than the zest, but it is still a very good cake.
Monday, August 27, 2012
What's Baking?: S'mores Brownies
Growing up in the military means a lot of moving, a lot of new homes, and a lot of new friends. Unfortunately, for me, it also meant that I don't have a lot of attachments to places. People often ask me my favorite place, and I can't begin to wrap my mind about how to decide that.
The theme for this baking challenge was something that reminded us of a happy place. The one place in my mind that I keep going back to in my head though is Oregon. I've only been there a few times and it is always for vacation, but there is something that I love about it. Every time I go there, we go to the beach and do s'mores while the sun is setting. It is just such a perfect scene paired with something gooey and finger-licking good that I guess in my mind, it has become my happy place.
Nicole on Prevention, R.D. posted these brownies for a recipe swap that we had not too long ago, and I thought they were perfect for this occasion. The amazing things about a s'more on a gooey brownie, yes please!
S'mores Brownies
from Prevention, R.D.
Ingredients
1 pack brownie mix (and ingredients called for on the back of the box)
2 cups miniature marshmallows
4 graham crackers, broken into chunks
2 Hershey’s Milk Chocolate Bars, broken into the individual segments
Directions
1) Preheat the oven to 350 F. Spray 9×9-inch baking pan with non-stick cooking spray.
2) Prepare the brownie mix according to the directions on the box.
3) After baking, remove the pan from the oven and set the oven to broil.
4) Cool brownies for about a minute then sprinkle the marshmallows over the warm brownies. Make sure to cover most of the area.
5) Sprinkle the graham crackers on top of the marshmallows. Broil about 4-5 inches from the heat for 30 seconds to a minute until the marshmallows are golden brown. Watch carefully so that they don’t burn.
6) Sprinkle with Hershey’s milk chocolate bars.
I had one of these and sent them directly up to work with my husband. They were absolutely fantastic. He came home with a completely empty tray and several requests for the recipe. We had a couple over for dinner last night and the guy said that they were one of the best brownies he had ever had. These definitely transported me back to the memories of Oregon even though I am nowhere remotely close to Oregon. Someday I hope that my kids and I can watch a sunset while eating S'mores...or maybe I'll whip up a batch of these S'more brownies instead.
The theme for this baking challenge was something that reminded us of a happy place. The one place in my mind that I keep going back to in my head though is Oregon. I've only been there a few times and it is always for vacation, but there is something that I love about it. Every time I go there, we go to the beach and do s'mores while the sun is setting. It is just such a perfect scene paired with something gooey and finger-licking good that I guess in my mind, it has become my happy place.
Nicole on Prevention, R.D. posted these brownies for a recipe swap that we had not too long ago, and I thought they were perfect for this occasion. The amazing things about a s'more on a gooey brownie, yes please!
S'mores Brownies
from Prevention, R.D.
Ingredients
1 pack brownie mix (and ingredients called for on the back of the box)
2 cups miniature marshmallows
4 graham crackers, broken into chunks
2 Hershey’s Milk Chocolate Bars, broken into the individual segments
Directions
1) Preheat the oven to 350 F. Spray 9×9-inch baking pan with non-stick cooking spray.
2) Prepare the brownie mix according to the directions on the box.
3) After baking, remove the pan from the oven and set the oven to broil.
4) Cool brownies for about a minute then sprinkle the marshmallows over the warm brownies. Make sure to cover most of the area.
5) Sprinkle the graham crackers on top of the marshmallows. Broil about 4-5 inches from the heat for 30 seconds to a minute until the marshmallows are golden brown. Watch carefully so that they don’t burn.
6) Sprinkle with Hershey’s milk chocolate bars.
I had one of these and sent them directly up to work with my husband. They were absolutely fantastic. He came home with a completely empty tray and several requests for the recipe. We had a couple over for dinner last night and the guy said that they were one of the best brownies he had ever had. These definitely transported me back to the memories of Oregon even though I am nowhere remotely close to Oregon. Someday I hope that my kids and I can watch a sunset while eating S'mores...or maybe I'll whip up a batch of these S'more brownies instead.
Sunday, July 29, 2012
Fresh Cherry Cupcakes
Confession...I love cherry flavors in things, but rarely eat fresh cherries. I think I just got it into my head that they're too much work. The pit just seems to get in the way of enjoying them, so I stick to maraschino cherries or my favorite Cherry Garcia ice cream. Yum!
I decided for the What's Baking Challenge: Summer Fruits, that I'd try to tackle something with cherries. What I found is that the pit isn't really that big of a deal. Go out to your local farmers market and grab a quart to make these as soon as possible!
Fresh Cherry Cupcakes
from Baking Bites Ingredients
1 1/2 cups all purpose flour
1 1/4 teaspoon baking powder
1/4 teaspoon salt
1/2 cup butter, room temperature
1 cup sugar
1 large egg
1 teaspoon vanilla extract
1/4 teaspoon almond extract
1 cup buttermilk
1 cup finely chopped fresh pitted cherries
Directions
1) Preheat oven to 350F. Line 16 muffin cups with paper liners.2) In a medium bowl, whisk together flour, baking powder and salt.
3) In a large bowl, cream together butter and sugar until light. Blend in the egg, vanilla extract and almond extract until smooth. Working in two or three additions, gradually mix in the dry ingredients, alternating with additions of buttermilk and ending with an addition of the last of the flour mixture.
4) Stir in chopped cherries.
5) Bake for 16-19 minutes, until a toothpick inserted into the center comes out clean. Cool cupcakes on a wire rack completely before frosting.
Quick Vanilla Buttercream
1/2 cup butter, room temperature
3 tablespoons milk
1 teaspoon vanilla extract
2-3 cups confectioners’ sugar
16 whole cherries
3 tablespoons milk
1 teaspoon vanilla extract
2-3 cups confectioners’ sugar
16 whole cherries
Directions
1) Combine butter, milk, vanilla and 2 cups of confectioners’ sugar in a medium mixing bowl and mix on high speed until smooth.
2) Gradually blend in remaining confectioners’ sugar until frosting reaches a creamy, spreadable consistency. Add additional sugar to thicken frosting if necessary.1) Combine butter, milk, vanilla and 2 cups of confectioners’ sugar in a medium mixing bowl and mix on high speed until smooth.
3) Top each cupcake with frosting and a whole, fresh cherry.
My husband started at his new base this month, so I sent these in with him. I loved that each bite had a lot of cherries in it. I've had many cupcakes with maybe one piece of fruit in them and it takes away from the fruit and becomes more about the cake. This recipe is great at highlighting the cherry. My husband said these were gone before he even put the carrying case on the table. Apparently military guys are easy to please. :)
Sunday, May 27, 2012
What's Baking: Blueberry Lemon Loaf
I still feel like a novice baker, but like the age old saying goes "Practice makes perfect.". I decided to join another recipe challenge that has to do with baking. Deep down inside, I felt like it would be a great challenge, but at the same time, I was scared about how my project would turn out. This month's challenge from Ammie at Adventures in My Kitchen: baking with produce.
I have to admit that the recipe I wanted to make changed a lot. First it was raspberry and lemon cupcakes, but my store didn't have raspberries. Then I thought I'd do the Blueberry Lemon cupcakes from Annie's Eats, but mid-week, I changed my mind because I didn't want to bother with frosting anything. So, I found this: Blueberry Lemon Loaf. I love recipe challenges because they cause me to stumble over new blogs. Hopefully other people stumble across my blog that way too.
Blueberry Lemon Loaf- makes one loaf
adapted from Vicarious Foodie
Ingredients
1 1/2 cups all-purpose flour
1 teaspoon baking powder
1/4 teaspoon salt
1/2 cup unsalted butter, room temperature
3/4 cup granulated white sugar
2 large eggs
1/2 teaspoon pure vanilla extract
2 tablespoons grated lemon zest
2 tablespoons fresh lemon juice (1 lemon)
1/2 cup milk
2 1/4 cups fresh or frozen blueberries
Lemon Glaze:
2/3 cup granulated white sugar
6 tablespoons fresh lemon juice (about 3 lemons)
3) In the bowl of an electric mixer or with a hand mixer, beat the butter until softened. Add the sugar and continue to beat until light and fluffy. Add the eggs, one at a time, beating well after each addition. Beat in the vanilla extract, lemon zest, and lemon juicet.
4) With the mixer on low, add the flour mixture (in three additions) and milk (in two additions) alternately, starting and ending with the flour. Mix only until combined.
5) Gently fold in the blueberries.
6) Scrape the batter into the prepared pans and bake for about 40 to 45 minutes, or until the bread is golden brown and a toothpick inserted in the center comes out clean.
7) Meanwhile, in a small saucepan, bring the 1/3 cup of sugar and the 3 tablespoons of lemon juice to a boil, stirring until the sugar dissolves.
8) When the bread is done, remove from oven and place on a wire rack. Pierce the hot loaves all over with a wooden skewer or toothpick, and then brush the tops of the loaves with the hot lemon glaze. Cool the loaves in the pans for about 30 minutes, then remove from pan and let cool completely on a wire rack.
While I found this bread really good, I love intense lemon flavors, so I adjusted the recipe to include more lemon juice. If you like duller lemon flavors, don't add the lemon juice to the wet mix ingredient mixture, and cut the glaze amount in half. I also added quite a bit more blueberries so that the loaf was bursting with blueberries. I thought it was a great loaf and would be perfect for a brunch or just a morning get together with friends. I love the contrasting colors of the lemons and the blueberries and am glad that I ended up making this, instead of the other choices. So next time you find yourself scared of baking, try making this lemon loaf: very easy to make and very good.
I have to admit that the recipe I wanted to make changed a lot. First it was raspberry and lemon cupcakes, but my store didn't have raspberries. Then I thought I'd do the Blueberry Lemon cupcakes from Annie's Eats, but mid-week, I changed my mind because I didn't want to bother with frosting anything. So, I found this: Blueberry Lemon Loaf. I love recipe challenges because they cause me to stumble over new blogs. Hopefully other people stumble across my blog that way too.
Blueberry Lemon Loaf- makes one loaf
adapted from Vicarious Foodie
Ingredients
1 1/2 cups all-purpose flour
1 teaspoon baking powder
1/4 teaspoon salt
1/2 cup unsalted butter, room temperature
3/4 cup granulated white sugar
2 large eggs
1/2 teaspoon pure vanilla extract
2 tablespoons grated lemon zest
2 tablespoons fresh lemon juice (1 lemon)
1/2 cup milk
2 1/4 cups fresh or frozen blueberries
Lemon Glaze:
2/3 cup granulated white sugar
6 tablespoons fresh lemon juice (about 3 lemons)
Directions:
1) Preheat oven to 350 degrees F (325 degrees for dark-finish
pans) and place the oven rack in the center of the oven. Grease a loaf pan, so loaf doesn't stick.
2) In a separate bowl, whisk together the flour, baking powder,
and salt. Set aside.3) In the bowl of an electric mixer or with a hand mixer, beat the butter until softened. Add the sugar and continue to beat until light and fluffy. Add the eggs, one at a time, beating well after each addition. Beat in the vanilla extract, lemon zest, and lemon juicet.
4) With the mixer on low, add the flour mixture (in three additions) and milk (in two additions) alternately, starting and ending with the flour. Mix only until combined.
5) Gently fold in the blueberries.
6) Scrape the batter into the prepared pans and bake for about 40 to 45 minutes, or until the bread is golden brown and a toothpick inserted in the center comes out clean.
7) Meanwhile, in a small saucepan, bring the 1/3 cup of sugar and the 3 tablespoons of lemon juice to a boil, stirring until the sugar dissolves.
8) When the bread is done, remove from oven and place on a wire rack. Pierce the hot loaves all over with a wooden skewer or toothpick, and then brush the tops of the loaves with the hot lemon glaze. Cool the loaves in the pans for about 30 minutes, then remove from pan and let cool completely on a wire rack.
While I found this bread really good, I love intense lemon flavors, so I adjusted the recipe to include more lemon juice. If you like duller lemon flavors, don't add the lemon juice to the wet mix ingredient mixture, and cut the glaze amount in half. I also added quite a bit more blueberries so that the loaf was bursting with blueberries. I thought it was a great loaf and would be perfect for a brunch or just a morning get together with friends. I love the contrasting colors of the lemons and the blueberries and am glad that I ended up making this, instead of the other choices. So next time you find yourself scared of baking, try making this lemon loaf: very easy to make and very good.
Subscribe to:
Posts (Atom)