I've been a little absent from my blog lately. Once my husband left for his deployment, I started working out and lost 11 pounds. It is hard to lose 11 pounds when you're perusing food on the internet all the time.
However, I signed up for the Secret Recipe Club this month, so that I at least had one exciting dish to look forward to. I was assigned IlonasKitchen. I found out that she is from New Jersey too and I had a blast looking through all the recipes finding delicious ones like Pork Carnitas, Creamy Goat Cheese Pasta with Lemon and Spinach, and for dessert Strawberry Cake Batter Blondies. Every recipe sounded delicious, but I settled for Apple Pie Bread. I love quickbreads and am going through a Honeycrisp apple phase, so it sounded like the perfect pairing.
Apple Pie Bread
slightly adapted from IlonasKitchen
Ingredients
1/2 cup butter, softened
1/2 cup sugar
1/2 cup brown sugar
1/4 cup buttermilk
2 teaspoons baking powder
2 eggs
1 teaspoon vanilla
1/2 teaspoon almond extract
2 cups all-purpose flour
1/2 teaspoon salt
2 cups chopped, peeled apple (about 4 medium)
1 teaspoon cinnamon
1/2 teaspoon all spice
1/4 teaspoon ginger
Topping
2 tablespoons brown sugar
pecans
Directions
1. Preheat oven to 350 degrees F. Grease the bottom and 1/2 inch up the sides of an 9x5x3-inch loaf pan; set aside.
2. In a large bowl, beat butter with an electric mixer on medium to high speed for 30 seconds. Beat in both sugars until combined. Add buttermilk and baking powder; beat until combined. Add eggs and vanilla; beat until combined. Add flour and salt; beat until combined. Stir in apple and spices.
3. Spoon batter into prepared pan; spread evenly. Sprinkle brown sugar and nuts over the batter. Bake for 60 to 65 minutes or until a wooden toothpick inserted near the center comes out clean.
4. Cool in pan on a wire rack for 10 minutes. Remove from pan. Cool completely on wire rack.
The second you bite into this bread you just want to say yum. It has all the comfort qualities of apple pie in a quick bread. I just eyeballed my apples and I think I had more apples than batter, but it paid off in the long run. Each bite was bursting with apples and flavor. The only thing that the original recipe called for that I wish I would have done was add the pecans to the batter. I loved the crunch that they added to the top layer, but I think it would have been better if they were throughout the batter as well. I guess it just depends if the people that you're feeding it to like nuts. I can't wait to use this quick bread for get togethers in the future.
Monday, December 9, 2013
Monday, November 4, 2013
Secret Recipe Club: Risotto Stuffed Mushrooms
It seems like just yesterday was the October post date for Secret Recipe Club, and here it is already November. For this blog swap, I received Kate's blog: Kitchen Trial and Error. The question leading into the name on her blog was: Isn't everything in the kitchen trial and error? I feel like that is still very true for me! I still cross my fingers hoping everything turns out edible almost every time I turn on the oven.
I told myself that I was going to look for a soup recipe for this month. Kate has some great sounding soups (32 soups in total on her blog), like: Vegetarian Wild Rice Soup, the amazing looking Toasted Orzo Chicken Soup, and Tomato and Meatball soup. All sound perfect for fall.
However, in looking at a soup on her blog, one of the "You might also like" pictures was for Risotto Stuffed Mushrooms. I couldn't go back to soup once I read about this recipe. My husband has been deployed for a month and I haven't made one stuffed mushroom dish (he isn't a fan). I knew that I had to make this dish.
Risotto Stuffed Mushrooms
barely adapted from Kitchen Trial and Error
Ingredients
Risotto
1 tablespoons unsalted butter
1 leek, white and light green parts, thinly sliced
5 cups low sodium vegetable broth
1 1/4 cups arborio rice
1/2 cup marsala wine
1/2 cup frozen peas
1/2 cup grated parmesan cheese
juice from half a lemon (about 2 tablespoons)
salt & pepper
Mushrooms
2 portobello mushrooms, cleaned and gills removed
about 1 cup leftover risotto
2 tablespoons of mozzarella cheese
Directions
1) Melt the butter over medium heat in a dutch oven. Add the leeks and saute until slightly soft, about 3 minutes.
2) In a separate pan, warm the broth over medium high heat.
3) Add the rice to the leeks and stir and cook until translucent, about 2 minutes.
4) Add the marsala wine and stir to deglaze the pan. cook until mostly evaporated 1-2 minutes.
5) Preheat your oven to 400F and clean the mushrooms. put the mushrooms on a sheet tray upside down (gill side up) and drizzle with olive oil. Season with salt & pepper and Italian seasonings and bake about 15 minutes until softened.
6) Add about 1cup of broth to the rice. stir to incorporate. cook until the liquid is absorbed. continue adding broth, stirring to incorporate, and cooking until the liquid is absorbed until creamy, about 30 minutes.
7) Add the frozen peas and mix in. Mix in the parmesan cheese. Remove from heat, cover, and let stand a couple minutes. Once it is done standing, add in the lemon juice and season with salt and pepper.
8) When the mushrooms are done, spoon the risotto into the caps and top with cheese. bake an additional 10 minutes, until the cheese is melted.
Like Kate says, people either love mushrooms or hate them, however if you love mushrooms, this is a great stuffed mushroom recipe to try. The mushroom and the risotto pair nicely to make a great meal. I may have added more marsala wine than recommended above, and could taste the extra that I had put in. This is a great dish and I think would make a great special occasion dish for anyone who is vegetarian.
Tuesday, October 15, 2013
12 Weeks of Christmas Treats: Pumpkin Snickerdoodles
When I think of treats that I want at Christmas, they are things that remind me of home. Home is what makes Christmas so special in my mind, probably because it is the one time of year that I tend to make it home more than any other. The things that make desserts seem like home are pumpkin, cinnamon, and spices like allspice. I think that is why pumpkin pie, apple pie, etc make it to the top of everyone's favorite dessert lists.
I decided to make a dessert for 12 Weeks of Christmas Treats, hosted by Brenda at Meal Planning Magic, that doesn't scream Christmas, but reminds you of home.
Pumpkin Snickerdoodles
from Recipe Girl
Ingredients
Cookies
1 cup (2 sticks) salted butter, at room temperature
1 cup granulated white sugar
1/2 cup light brown sugar
3/4 cup pure unsweetened pumpkin puree
1 large egg
2 teaspoons vanilla extract
3 3/4 cups all-purpose flour
1 1/2 teaspoons baking powder
1/2 teaspoon salt
1/2 teaspoon ground cinnamon
Rolling Sugar
1/2 cup granulated white sugar
1 teaspoon ground cinnamon
1/2 teaspoon ground ginger
1/2 teaspoon allspice
Directions
1) In a large bowl, use an electric mixer to cream the butter until fluffy. Add sugars and pumpkin puree and beat well. Mix in egg and vanilla, scraping down sides of the bowl to incorporate all of the ingredients.
2) In a medium bowl, whisk together flour, baking powder, salt and ground cinnamon. Beat flour mixture into liquid mixture a little at a time just until incorporated.
3) Cover dough with plastic and chill at least an hour, or until dough becomes slightly firm.
4) When ready to bake, preheat oven to 350°F. Line baking sheets with parchment paper (or spray with nonstick spray). Mix rolling sugar ingredients in a small bowl.
5) Remove cookie dough from refrigerator. Use a medium cookie scoop (1 1/2 Tablespoons) or a large spoon to scoop out dough and roll into balls. Use your hands to roll the balls in the cinnamon sugar and make sure they're coated really well. Place 2 inches apart on the prepared baking sheets. Use a glass with a nice, flat bottom dipped in sugar and flatten the balls.
6) Bake at 350°F. for 15 minutes, or until they are slightly firm to the touch. Let cool on baking sheets for 5 minutes or so, then remove them to a wire rack to cool completely.
The only comment that I have about this recipe is that the original cooking time (10 to 14 minutes), listed on the Recipe Girl website didn't work for my cookies. My oven was still heated from dinner by the time I put the cookies in and they were still underdone in the center. I think fifteen minutes should be the low end of baking time for these cookies.
I did love these cookies. Pair them with a glass of milk and you have a perfect dessert, in my opinion. I love finding delicious pumpkin recipes to try outside of pumpkin pie. This one hits the spot.
Monday, October 7, 2013
Secret Recipe Club: Granola Cookies
My husband deploys for six months starting tomorrow. We've known he was going to deploy for awhile, but we just found out the day that he was leaving less than a week ago. Needless to say...things have been stressful at our house. I was thankful for the Secret Recipe Club this month because it gave me some respite from the stress and allowed me some time just to think about baking for awhile.
This month's assignment was Love and Flour, written by LeAndra. I actually found my recipe by going and looking at things pinned from Love and Flour on Pinterest. It helped me focus my eyes onto this great Granola Cookie recipe. Please go check out all the delicious desserts on Love and Flour, and also check out her Oktoberfest series. All the recipes look delicious.
Granola Cookies
from Love and Flour
Ingredients
2¼ cups all-purpose flour
1 teaspoon salt
1 teaspoon baking powder
½ teaspoon baking soda
1 cup (2 sticks) butter, softened
1¼ cups light brown sugar, packed
¾ cup granulated sugar
2 eggs
2 teaspoons vanilla extract
2 cups granola
1 cup chocolate chips
½ cup dried cranberries or cherries
Directions
1) Cream the butter and sugars together until light and fluffy, about 1 to 2 minutes.
2) Beat in the eggs and the vanilla until the mixture is well incorporated and smooth.
3) Whisk together the flour, salt, baking powder and baking soda.
4) Now beat in the flour mixture until incorporated.
5) Stir in the granola, chocolate chips and dried cranberries.
6) Drop the dough by rounded tablespoons onto a parchment-lined baking sheet.
7) Bake at 350 degrees for 10-14 minutes until golden brown along the edges and puffed in the centers.
8) Allow the cookies to cool on the baking sheet for a few minutes before transferring to a wire rack to cool completely.
I have this amazing cherry vanilla granola that I buy in stores and it worked perfectly for these cookies. I love cookies with little surprises in them and between the crunchiness of the granola, the sweetnes of the chocolate, and the tanginess of the cranberries, these cookes are the perfect balance of everything good in a cookie.
Please browse through all the other recipes made this month. I plan to cook a lot while my husband is gone to pass the time, so please check back if you have a chance.
Tuesday, September 24, 2013
Cherry Surprise Crinkles
It is time for another 12 Weeks of Christmas Treats. This great idea is hosted by Brenda at Meal Planning Magic. I love this recipe get-together because it provides great ideas once Christmas actually rolls around (I don't have enough self restraint to keep all of these good treats in my freezer until Christmas).
One of my guilty pleasures around Christmas is chocolate covered cherries. There is something about the combination of cherries and chocolate that just seem so Christmas-y to me. For my first treat, while I would love to make chocolate covered cherries, I know they would never live up to my favorite treat, so I decided to make these Cherry Surprise Crinkles. They combine the two greats into cookie form that creates a delicious cookie.
Cherry Surprise Crinkles
from Better Homes and Gardens
Ingredients
1/2 cup butter, softened
1 cup granulated sugar
1/2 teaspoon baking powder
1/4 teaspoon baking soda
1/4 teaspoon salt
1 egg
1 teaspoon almond extract
2 cups all-purpose flour
1/2 cup chopped maraschino cherries, well drained and patted dry with paper toweling
12 Kisses cherry cordials or Kisses dark chocolates
Powdered sugar
Directions
1) Preheat oven to 350 degrees F. In a medium mixing bowl beat butter with an electric mixer on medium to high speed for 30 seconds. Add the granulated sugar, baking powder, baking soda, and salt. Beat until combined, scraping sides of bowl occasionally. Beat in egg and almond extract until combined. Beat in as much of the flour as you can with the mixer. Stir in any remaining flour and the cherries.
2) Take a tablespoon of dough. Shape each portion into a ball around a Kiss. Place balls 2 inches apart on ungreased cookie sheets.
3. Bake for 10 to 12 minutes or until bottoms are light golden brown. Transfer cookies to a wire rack and let cool. Lightly dust cooled cookies with powdered sugar
I thought for sure that I'd be eating these cookies alone in my house because I'm much more into the cherry and chocolate combination than my husband, but after only 2 days, there were only enough for the picture. Success in my mind. I wish that the Maraschino cherries has a better quality to them, but these were fantastic cookies.
Please see all the other treats below.
Monday, September 9, 2013
Secret Recipe Club: Samoa Bars
Confession: I was assigned Ewa's blog Delishhh for the Secret Recipe Club this month and I spent more time looking at the pictures than reading the actual recipes. The pictures are so gorgeous and in all honesty, my pictures don't even do this dessert justice, so please go to her blog and eat with your eyes. You'll thank me for telling you to go there.
This month, while I was looking at Ewa's pictures, I had a hard time deciding. Ewa has a passion for healthy, simple, delicious, and fun recipes. While I set out to find a healthy and simple recipe, I ended up getting hooked on a delicious and fun one.
In my mind, the problem with Girl Scout Cookies is that they are only available at certain times of the year. Sometimes you just have a day where you really need those delicious cookies, and they are totally out of season. I honestly had that kind of month where I needed BOXES of those cookies, so these Samoa Bars were screaming at me. I know, I know, it isn't Girl Scout season. Actually it is about 6 months from Girl Scout season. Luckily, the Keebler Elves saved my life and provided me with Coconut Dreams (aka Samoas) and Sandies (aka Trefoils or however you spell them).
Samoa Bars
barely adapted from Delishhh
Ingredients
Crust
4 tablespoons of melted butter
1 box (9 oz) of shortbread cookies
Filling
2 boxes of Samoa Girl Scout cookies (or Coconut Dreams from Keebler)
16 oz semi sweet chocolate chips
1/2 cup unsweetened shredded coconut
1/2 cup jarred caramel sauce
Directions
1) Preheat oven to 325 degrees. Grease a 9 by 9 baking pan. Line the pan with parchment paper, allowing the excess to hang over the sides of the pan.
2) For the crust: Pulse the shortbread cookies in a food processor until the cookies resemble the texture of bread crumbs. Melt the better, and pulse with the crumbs to incorporate. Press the mixture into the baking pan and bake for 12 minutes until golden brown.
3) Melt the chocolate chips in a microwave safe bowl by microwaving for 30-second increments and stirring after each increment, until completely melted.
4) Pour the chocolate on the shortbread crust, reserving 2 tablespoons.
5) Pulse coconut cookie until they are 1/2 inch pieces. Press Samoas on top of the chocolate layer.
6) Sprinkle coconut on top of the cookie layer, and then layer caramel sauce and chocolate drizzle.
7) Refrigerate 30 minutes to set.
These bars are incredible. Ewa has a recipe for caramel on her blog, but mine turned out horribly wrong and I ended up having to cheat and use the jarred caramel. I love how these bars have Samoa cookies in them, but then the bar themselves is a bar-like form of the cookie. These are definitely fun and delicious. I can't wait to try them with the real Girl Scout Cookies. Check out what all the other swap participants made for this swap.
Thursday, August 15, 2013
Spiced Pork with Caribbean Salsa
It has been awhile since I participated in the Eat the Alphabet Challenge that is hosted by Brenda at Meal Planning Magic. This is a great challenge to eat more produce and legumes. Head over to Brenda's blog to view the challenge details. She also hosts a 12 Weeks of Christmas Treats challenge that is about to start in September.
It seems like by the time I get the reminder for the challenge each month, I'm already drowning in other things. However, this month I planned ahead and found this recipe with mangoes for the 'M, N, O' letter challenge. I love mangoes, but the huge pit often leaves me frustrated. I have decided only to use them if a recipe sounds really amazing.
I love Skinnytaste.com because her recipes are ones that my husband requests. I can make Weight Watcher food without it being boring and seeming like healthy food. She had this recipe that I've been meaning to make for awhile, and seemed perfect to tie in with this challenge.
Spiced Pork with Caribbean Salsa
slightly adapted from Skinnytaste.com
Ingredients
Pork
2 pound boneless pork loin
6 cloves garlic, crushed
1 lime, squeezed
1/2 cup fresh orange juice
Caribbean salsa
1 haas avocado, diced
1 jalapeno, seeded and diced
2 large ripe mangos, peeled, seeded and coarsely chopped
1 1/2 tablespoons chopped red onion
1-2 tablespoons chopped fresh cilantro
2-3 tablespoon fresh lime juice
salt and pepper, to taste
Directions
1) Using a sharp knife, cut slits into the pork and stuff holes with half of the crushed garlic. Combine the remaining garlic, seasonings, and salt, rub all over pork. Place in a large container, pour the lime and orange juice over the pork; cover and refrigerate 5 hours or overnight, turning pork occasionally so the marinade covers all of pork.
2) The next morning, put everything in the crock pot and cook on LOW for 9 hours. After 9 hours, shred the pork.
3) Remove liquid from crock pot and reserve. Add shredded pork back to the slow cooker. Add about 1 cup of the liquid back into the crock pot and taste for salt and pepper. Let it cook an additional 15 minutes.
It seems like by the time I get the reminder for the challenge each month, I'm already drowning in other things. However, this month I planned ahead and found this recipe with mangoes for the 'M, N, O' letter challenge. I love mangoes, but the huge pit often leaves me frustrated. I have decided only to use them if a recipe sounds really amazing.
I love Skinnytaste.com because her recipes are ones that my husband requests. I can make Weight Watcher food without it being boring and seeming like healthy food. She had this recipe that I've been meaning to make for awhile, and seemed perfect to tie in with this challenge.
Spiced Pork with Caribbean Salsa
slightly adapted from Skinnytaste.com
Ingredients
Pork
2 pound boneless pork loin
6 cloves garlic, crushed
1 tablespoon allspice
1/4 teaspoon ground cinnamon
1/4 cup brown sugar
1 teaspoon
1/4 teaspoon ground cloves
1/4 teaspoon ground cumin
2 teaspoons salt
1 teaspoon freshly ground black pepper
2 tablespoons canola oil
1/2 teaspoon coarse salt 1 lime, squeezed
1/2 cup fresh orange juice
Caribbean salsa
1 haas avocado, diced
1 jalapeno, seeded and diced
2 large ripe mangos, peeled, seeded and coarsely chopped
1 1/2 tablespoons chopped red onion
1-2 tablespoons chopped fresh cilantro
2-3 tablespoon fresh lime juice
salt and pepper, to taste
Directions
1) Using a sharp knife, cut slits into the pork and stuff holes with half of the crushed garlic. Combine the remaining garlic, seasonings, and salt, rub all over pork. Place in a large container, pour the lime and orange juice over the pork; cover and refrigerate 5 hours or overnight, turning pork occasionally so the marinade covers all of pork.
2) The next morning, put everything in the crock pot and cook on LOW for 9 hours. After 9 hours, shred the pork.
3) Remove liquid from crock pot and reserve. Add shredded pork back to the slow cooker. Add about 1 cup of the liquid back into the crock pot and taste for salt and pepper. Let it cook an additional 15 minutes.
4) Meanwhile make the Caribbean salsa. Combine all the
ingredients in a bowl, season to taste with salt and pepper. Refrigerate salsa
until ready to serve
The original version of this is for Jerk Pork, but I can't eat red pepper flakes or spicy seasonings. I found a home-made recipe for Jerk Seasonings and left out the spices I couldn't have. In return, I bumped up the heat in the salsa by using a jalapeno that had the seeds left in. I thought it was very spicy but the avocado and the sweetness from the sugar in the pork counterbalanced it really well. The meat in this recipe turned out so tender and delicious. In my opinion this dish wouldn't be the same without the salsa though. I love the brightness and the flavor that this brings to the dish.
Please check out all the other blog posts and stop by to see the dessert that I have planned for next month's Eating the Alphabet challenge!
Monday, August 5, 2013
Secret Recipe Club: Peach Mango Shrimp Quinoa
This month for Secret Recipe Club, I was assigned Food Ramblings. Food Ramblings is written by Elizabeth, who writes to hold herself accountable to eating better, cooking more, getting in shape and losing weight by writing her blog.
Elizabeth's blog has a lot of great recipes, such as: French Onion Soup Casserole, Grilled Ratatouille Pasta, and Pretzel Salted Caramel Blondies. I usually make dessert for the Secret Recipe Club challenges, but I recently started Weight Watchers, so I decided to try something a little more Weight Watcher friendly. So even though the blondies kept calling my name, I decided to try this Peach Mango Shrimp Quinoa instead. Drop by her blog to check out the amazing recipes, and if you try the blondies, please let me know if they are as amazing as they sound.
Peach Mango Shrimp Quinoa
from Food Ramblings
Ingredients
1 cup quinoa
2 cloves garlic, minced
1 onion, chopped
1 pound frozen shrimp, tails removed, uncooked
2 cups peach-mango salsa
Directions
1) Cook quinoa according to package instructions.
2) At the same time, heat skillet over medium-high heat. Spray with cooking spray. Add garlic and cook until starting to brown. Add and cook onions and shrimp, until the shrimp is pink. Add peach-mango salsa.
3) When quinoa is done, add to skillet and mix well.
While I loved the flavor of this dish, the salsa I used wasn't moist enough to be considered a sauce. This left the whole dish feeling a little dry. I did love that this dish was very easy to prepare on a weeknight. I definitely want to try this dish again, but using some different salsa.
Monday, July 29, 2013
Smoked Salmon and Goat Cheese Panini
When we first moved to New Jersey, I kept seeing smoked salmon in the grocery store. For the longest time, both Jacob and I kept picking it up and talking about how we wanted to make something with smoked salmon...but it just never happened.
Last week I saw Panini flavor profile suggestions, and this was on it, and I knew that we had to try it. I love paninis and how fast they are to put together, so I put this on our Sunday afternoon lunch menu.
Smoked Salmon and Goat Cheese Panini
slightly adapted from Weight Watchers
Ingredients
7 ounces smoked salmon
2 ounces goat cheese
Spinach
2 tablespoons of light mayonnaise
Ciabatta
Directions
1) Layer desired amounts of ingredients on the bread.
2) Press sandwich in a Panini press for about 3 minutes.
I know this is seriously a ridiculously easy recipe, but it tasted amazing. I loved the strong flavor of the goat cheese and the salmon together. To me, those two ingredients are meant to go together. The mayo just provides a little moisture to the sandwich so it isn't dry, but you could easily leave it off. I loved this sandwich and this post is making me want to run out and buy the ingredients to make it again. If you're looking for a simple and delicious sandwich for a weekend afternoon, you have to try this.
Friday, July 26, 2013
Cabernet Burgers
Nothing better than burgers in the summer, right? Things in New Jersey got a little warm this last week, so I thought I'd participate in the Grilling swap hosted by Sarah at A Taste of Home Cooking.
I love running across new versions of burgers. While sometimes there is nothing better than a regular cheeseburger, sometimes it is nice to splurge on ingredients and do something like a Cabernet burger.
Cabernet Burgers
slightly adapted from Kylee Cooks
Ingredients
Glaze
2 cups cabernet sauvignon
1 tablespoon brown sugar
Butter
1/4 cup unsalted butter (1/2 stick), softened
1 tablespoon fresh rosemary leaves, minced
Patties
1-1/2 pounds ground turkey
1/4 cup Cabernet glaze (above)
2 teaspoons kosher salt
1/2 teaspoon black pepper
Burger construction
4 slices white cheddar cheese
8 slices tomato, 1/2 inch thick
2 cups spinach
Buns
Directions
1) In a heavy saucepan over medium heat, combine the wine and brown sugar. Cook until reduced to 1/2 cup, 25 to 30 minutes. Set aside to cool.
2) In a small bowl, mix the butter and rosemary.
3) Warm up the grill (450-550 degrees). Combine the meat and seasonings into four patties of equal size and thickness.
4) Grill the patties over direct high heat, brushing with glaze for every 2 minutes. During the last minute of cooking, place a slice of cheese on each patty to melt.
5) Lower the temperature of the grill to medium heat. Brush tomato slices with oil, season with salt and pepper and grill until soft (2-4 minutes). Spread the buns with the rosemary butter and grill until lightly toasted. Build each burger with spinach, a patty, and tomato.
These burgers ended up being the type that cause juices to flow down your arms while you're eating them. The wine made them very moist and juicy. The grilled tomatoes made what is usually a common boring topping a little more delicious with char flavor. My grocery store didn't have focaccia, so I just used regular buns, but I could see the focaccia taking this to another level. I'm glad we had a chance to try these burgers, and enjoying them with the remaining bottle of wine was an added bonus.
Monday, July 22, 2013
Chocolate Peanut Butter Pretzel Bars
Growing up, I hated pretzels. I just couldn't get over the dryness of them. Recently, I've started loving them. I love dipping them in peanut butter as a snack. Since I'm going through a pretzel phase, I thought it would be fun to bake with them. I found these on Pinterest and they had peanut butter and pretzels, so I knew they would be perfect.
Chocolate Peanut Butter Pretzel Bars
from Cinnamon Spice and Everything Nice
Ingredients
Chocolate Peanut Butter Pretzel Bars
from Cinnamon Spice and Everything Nice
Ingredients
Crust
1-1/2 cups all-purpose flour
3/4 cup ground pretzels (measure after crushing)
1/3 cup powdered sugar
1/2 cup melted butter
Filling
2 cups semisweet chocolate chips
1 cup creamy peanut butter
1 cup coarsely chopped pretzels, for topping
Directions
1) Preheat the oven to 350°F. Line a 9" x 13" baking pan with parchment, leaving long ends to use to remove the bars from the pan.
2) To make the crust: Whisk together the flour, ground pretzels and sugar until well combined. Mix in the melted butter using your fingers to evenly distribute it. You should have a soft but not wet dough.
3) Press the dough evenly into the pan and bake for 10 to 12 minutes. While the crust cooks make the filling.
4) To make the filling: Using a microwave melt the chocolate chips, stirring every 30 seconds until smooth and creamy. Add the peanut butter and stir until well combined and smooth.
5) Pour the filling over the warm crust and spread out evenly. Tap the pan on the counter to allow air bubbles to escape.
6) Press pretzels (either crushed or whole) down so that they stick into the chocolate.
7) Chill in the freezer for 1 hour. Use the parchment to lift the bars out of the pan onto a cutting board. Use a large chef's knife to slice into squares or bars. Serve frozen, chilled or at room temperature.
I took these to a get together and everyone broke into them before the main course was even ready. Everyone was so surprised how good they were, definitely an amazing dessert for the amount of time that it takes to get it together. To me, this dessert was the perfect blend of sweet and salty. The crust is kind of crumbly, so definitely eat these over a napkin or plate.
Monday, July 8, 2013
Secret Recipe Club: Oreo Cookies and Cream Cheesecake Bars
This month for the Secret Recipe Club, I was assigned The Busy Mom Café, written by Nancy. The Secret Recipe Club is a challenge in which you are assigned a blog and you have a month to choose anything you'd like to make from that blog.
I haven't posted since the last Secret Recipe Club reveal day. I took on another person's responsibilities at work this month and have been exhausted every day when I get home. My husband has been amazing and has stepped up and taken over a lot of dinners.
Since it has been getting warmer, I decided to make Cookies and Cream Ice Cream last weekend. Oreos were on sale and so I had an extra package, and instead of eating through row after row of them myself, I decided to make these delicious bars from Nancy's blog that I had been thinking about since I first received her blog. Please head over to Nancy's blog and check out her other recipes. She has a lot of breakfast recipes that sound incredible.
Oreo Cookies and Cream Cheesecake Bars
recipe from THE BUSY MOM CAFE
Ingredients
Crust:
1 package Oreo cookies
4 tablespoons unsalted butter, melted
Filling:
3-8 ounce packages cream cheese, room temperature
3/4 cup granulated sugar
3/4 cup sour cream, room temperature
1 teaspoon vanilla extract
1/2 teaspoon salt
3 large eggs, room temperature
Directions
1) Preheat oven to 325°F. Line a 9 x 13-inch pan with foil, leaving a 2-inch overhang on two sides, spray with cooking spray.
2) Place 28 Oreos in a food processor and process until finely ground. Pour the crushed Oreos into a large bowl. Melt 4 tablespoons of unsalted butter in a small bowl. Add the melted butter, and stir crumbs and butter are all combined.
3) Place the cookie-crumb mixture in a foil-lined pan. Using your fingers, press the mixture firmly and evenly into the bottom. Bake for 10 minutes, then remove to a cooling rack while you make the filling.
4) Crush up the remaining Oreos in half, so that your oreos are roughly chopped, and set aside.
5) Combine in a large bowl the cream cheese and sugar. Beat the combo with an electric mixer on medium speed for about two minutes. Scrape down the sides and bottom of the bowl with a spatula and beat again until uniform. Beat in sour cream, vanilla and salt. Scrape down the bowl and mix again.
6) Add the eggs, one at a time, beating well after each. After beating in the last egg, scrape down the sides and bottom of the bowl and beat one more time, to make sure the mixture is fully combined.
7) Pour in the chopped/ crushed oreos into the filling mixture. Stir in chopped Oreos with the same rubber spatula. Pour the cream cheese mixture over the baked cookie crust. Smooth the top with the rubber spatula.
8) Bake for 40 minutes or until the filling is set around the edges but still slightly wobbly in the center. Remove the pan to a wire rack to cool to room temperature, about 1 hour or longer.
9) When the cheesecake has set and cooled cover it with aluminum foil and place in the refrigerator for at least 3 hours or more.
These bars were amazing. I loved the amount of cookie per cream cheese in each bar. Mine took awhile to set-up, so don't make these right before you have to take them somewhere. I had my husband take these to work minus the one that is pictured above, and he said that the guys in his office devoured them. Thanks for a great recipe Nancy, these bars were every bit as delicious as they looked and sounded.
Monday, June 3, 2013
Secret Recipe Club: Mounds Brownies
This month for the Secret Recipe Club, the recipe swap in which you receive a blog and can choose any recipe to make, I received the Cookaholic Wife. I have been following Nichole's blog for about 2.5 years now. When I received her blog, I already had several recipes pinned that I wanted to try and from going through it again I found several other ones to try. I found a ton of recipes for muffins and a great looking taco calzone recipe.
Since this month's Secret Recipe Club coincided with Memorial Day, I knew right away that I'd make a dessert from her blog. I was torn between her cannoli cupcakes and these. Since my abilities to frost cupcakes is very poor, I decided these brownies were the treat I'd make for our Memorial Day get together.
Mounds Brownies
from Cookaholic Wife
Ingredients
1 stick unsalted butter
1/2 cup cocoa powder
2 eggs
1 cup sugar
1 tsp. vanilla
1/4 cup + 2 tbsp. all purpose flour
1/2 tsp. salt
1 cup shredded sweetened coconut
pinch of salt
1/2 cup sweetened condensed milk
Directions
1) Preheat the oven to 325 and line an 8x8
baking dish with enough foil that the edges hang over the sides of the pans a
little. Spray with non-stick cooking spray and set aside.
2) Melt the butter
in a small saucepan over low heat. Slowly whisk in the cocoa powder until
smooth. Remove from the heat and let sit for 5 minutes.
3) Then whisk in the
eggs to the cocoa powder mixture until combined. Next, add the sugar, vanilla,
flour and salt.
4) Spread half of the mixture evenly into the prepared baking
dish.
5) In another bowl, combine the coconut, salt and condensed milk
together. Drop spoonfuls on top of the brownie batter. Top with the remaining
batter and bake for 35 minutes or until a toothpick inserted in the center comes
out clean.
7) Let cool completely on a wire rack before transferring to the
refrigerate to chill for a few hours.
I don't remember ever having mounds bars, but if they taste like these brownies, I might start eating them more often. I loved the coconut in the brownies. The brownie batter created this deep rich fudgey brownie that was great with the coconut. These brownies in less time than it took to make them...very delicious. I'll definitely be making these again.
Please check out the other SRC member posts below.
Tuesday, May 14, 2013
Orange Teriyaki Chicken Kabobs
It's time for another Eating the Alphabet challenge. Brenda from Meal Planning Magic, issues the letters for the challenge and then you select something that corresponds with the letter to make. This month was 'G' or 'H'. I decided to use ginger because it is something that I rarely use.
A few months ago, I had Barbara Bakes for the Secret Recipe challenge. I found these chicken kabobs while browsing through her blog and decided they'd make a great weeknight dish since the marinade comes together quickly and the chicken is grilled. Something we're all looking for in summer meals: easy.
Head on over to Brenda's blog to get more information about the challenge and sign yourself up to participate!
Orange Teriyaki Chicken Kabobs
barely adapted from Barbara Bakes
Ingredients
2) Prepare Orange Teriyaki Glaze- Heat oil in a small saucepan over medium heat. Add ginger, orange zest, and garlic and cook stirring occasionally, about two minutes. Add vinegar, soy sauce, sugar, marmalade, orange juice, honey and red pepper. Cook stirring occasionally until slightly thickened, 3 to 5 minutes. and set aside.
A few months ago, I had Barbara Bakes for the Secret Recipe challenge. I found these chicken kabobs while browsing through her blog and decided they'd make a great weeknight dish since the marinade comes together quickly and the chicken is grilled. Something we're all looking for in summer meals: easy.
Head on over to Brenda's blog to get more information about the challenge and sign yourself up to participate!
Orange Teriyaki Chicken Kabobs
barely adapted from Barbara Bakes
Ingredients
Orange Teriyaki Glaze
2 tablespoons extra-virgin olive oil
2 tablespoons ginger, finely grated
1 tablespoon orange zest
1 clove garlic, finely grated or pressed
1/4 cup rice vinegar
3 tablespoons soy sauce
2 tablespoons sugar
2 tablespoons orange marmalade
1 tablespoon freshly squeezed orange juice
1 tablespoon honey
Kabobs
6 bamboo or metal skewers
3 boneless, skinless chicken breasts, cubed
Orange Teriyaki Glaze
Directions
1) If
using bamboo skewers, soak in water 30 minutes. 2) Prepare Orange Teriyaki Glaze- Heat oil in a small saucepan over medium heat. Add ginger, orange zest, and garlic and cook stirring occasionally, about two minutes. Add vinegar, soy sauce, sugar, marmalade, orange juice, honey and red pepper. Cook stirring occasionally until slightly thickened, 3 to 5 minutes. and set aside.
2) Thread chicken onto skewers. Preheat grill to high heat and grease grates with
oil.
3) Grill kabobs 2 - 3 minutes on all four sides. When
the chicken is nearly done, reduce the heat of the grill and slather on the
glaze. You want to be careful to let the glaze caramelize onto the chicken but
not let it burn - rotate frequently and slather on more glaze after turning.
Total cooking time should be about 15 minutes. You can slide the chicken cubes
apart and check to see if it is done, or cook to 170º.
Even though the picture is horrible, this was a great dish. While this chicken was fantastic, the ginger wasn't really prominent. I changed the recipe to have double the amount of ginger. I loved the amount of orange in the glaze though, it definitely came through. This was an easy dish and I served it with cilantro lime rice for a delicious dinner.
Monday, May 6, 2013
Cinnamon Swirl Pound Cake
I love cinnamon, and try to make things that have cinnamon as often as possible. When I received my Secret Recipe Club assignment for the month: Everyday Mom, I quickly settled on this recipe. I also chose this recipe because a bundt cake pan is something that I've wanted to get for a long time, so I was excited when I found mini-bundt cakes and look forward to using it to try other delicious recipes.
Everyday Mom is written by Kim, who looks like she has a lot of fun making stuff with and for her kids. I don't have kids yet, but hope that someday I can do food projects with my kids. I'm sure that will be yet another journey that my cooking will take us on. Check out Kim's blog to find kid friendly recipes and a lot of good-looking desserts.
Cinnamon Swirl Pound Cake
from Everyday Mom
Ingredients
Cinnamon Streusel Swirl:
1/2 cup all-purpose flour
1/3 cup firmly packed light brown sugar
1 tablespoon ground cinnamon
1/8 teaspoon salt
3 Tablespoons unsalted butter, melted
Buttermilk Pound Cake:
2 cups all-purpose flour
1/2 cup cake flour
1 teaspoon baking powder
1/4 teaspoon baking soda
1/2 teaspoon salt
1/4 teaspoon nutmeg
1/2 teaspoon cinnamon
1 cup unsalted butter, softened
2 cups granulated sugar
3 large eggs
2 teaspoons vanilla extract
1 tablespoon finely grated orange zest
1 cup buttermilk
Directions
1) Position a rack in the center of the oven and preheat the oven to 325 degrees F. Grease the inside of a 10-inch Bundt pan or all the compartments of a mini-bundt cake pan. Dust the pan with flour and shake out the excess.
Cinnamon Swirl:
2) In a small bowl, whisk together the flour, brown sugar, cinnamon and salt, breaking up any large lumps of brown sugar. Add the melted butter and stir until blended and crumbly.
Pound Cake:
3) Sift together the flours, baking powder, baking soda, salt, and nutmeg into a medium bowl. Whisk to combine, and set aside.
4) In the bowl of an electric mixer, using the paddle attachment, beat the butter at a medium speed until very creamy, about 2 minutes.
5) Gradually add the sugar and beat at medium-high speed until well blended and light, about 4 minutes.
6) At medium speed, add the eggs one at a time, beating well after each addition and scraping down the sides of the bowl as necessary. Beat in the vanilla extract and orange zest.
7) At low speed, add the dry ingredients in three additions, alternating with the buttermilk in two additions and mixing just until well combined.
8) Scrape half of the batter into the prepared pan and smooth it into an even layer. Sprinkle the streusel mixture evenly over the batter. Scrape the remaining batter on top and smooth it into an even layer.
9) Bake the cake for 65 to 75 minutes for a normal bundt cake pan or 45 minutes for mini-bundt cake pans, until a cake tester inserted into the center comes out clean. Cool the cake in the pan on a wire rack for 15 minutes.
While I was writing this blog post, my husband snuck two out of the pan while I wasn't looking and declared these really good. I love pound cake, so I knew they would be delicious. I put cinnamon in the batter as well, and unfortunately, I couldn't really taste the cinnamon. Next time, I think I'll ad even more. These are fantastic by themselves, but I can't wait to find toppings to try with them.
If you have a favorite recipe using your bundt cake pan, please feel free to leave me recipes in a comment.
Wednesday, May 1, 2013
Sloppy Joe Mac
Casseroles aren't really dishes that are meant for two people. A 9 by 13 pan of something plus a side dishe usually turns into a week of leftovers. Therefore, I don't really put casseroles on the menu very often.
Since I'm going through my sloppy joe phase, which I think by now I've exhausted all my sloppy joe recipes, when I saw this, I figured I'd make it. I considered cutting the recipe down to bake into a 9 by 9, but then ended up dumping the entire box of macaroni into the boiling water. Oops, more leftovers for me.
Sloppy Joe Mac
from FoodNetwork
Ingredients
3 tablespoons dark brown sugar
Directions
Since I'm going through my sloppy joe phase, which I think by now I've exhausted all my sloppy joe recipes, when I saw this, I figured I'd make it. I considered cutting the recipe down to bake into a 9 by 9, but then ended up dumping the entire box of macaroni into the boiling water. Oops, more leftovers for me.
Sloppy Joe Mac
from FoodNetwork
Ingredients
3 tablespoons dark brown sugar
3 tablespoons red wine vinegar
3 tablespoons Worcestershire sauce
One 15-ounce can tomato sauce
2 tablespoons olive oil
1 1/2 pounds ground beef
Salt and pepper to taste
3 to 4 cloves garlic, finely chopped
1 green pepper, seeded and finely chopped
1 onion, finely chopped
1 cup beef broth
12 ounces elbow macaroni with ridges
2 cups shredded yellow Cheddar
Directions
1) Preheat the oven to 400 degrees F.
2) Combine the brown sugar, vinegar, Worcestershire sauce and tomato sauce in a small bowl.
3) Heat the olive oil in a large skillet or Dutch oven over medium-high heat. Add the beef and cook until well browned. Season with salt and pepper.
4) Add the garlic, bell peppers and onions and cook, stirring, for 5 minutes.
5) Pour the tomato mixture over the beef, add the beef broth and stir until well combined. Simmer until thickened, 5 to 10 minutes.
6) Meanwhile, cook the macaroni in a large pot of salted boiling water until not quite tender, about 5 minutes. Drain and add to the sauce. Pour the mixture into a casserole dish and top with the cheese.
7) Bake until the casserole is bubbling and the top is browned.
This was a really easy dish and was really tasty too. I was surprised at how much it tasted like a sloppy joe. We really didn't have many leftovers. By the end of the first night, there was only half a pan left. I think this would be a great potluck dish. Kids would love it because of the mac and cheese part and it is simple to put together.
Sunday, April 28, 2013
Cream Cheese Meltaways
When I was a kid, I'd lose stuff and then have difficulty finding it again. My dad was in the military, and the ID card that they give everyone was always the first thing to disappear. My parents used to say, "It will always be the last place you look."
I felt very much that way for this baking challenge, for which Amanda from Our Italian Kitchen chose mini/bite sized treats. Everything I found was delicious looking truffles, and I couldn't find anything that I actually had to bake. I was so stuck on the truffle idea that I had almost given up, until I found these Cream Cheese Meltaways at Alida's Kitchen. I found what I was looking for in the last place I looked.
Cream Cheese Meltaways
from Alida's Kitchen
Ingredients
1 1/4 cups all-purpose flour
1/2 cup cornstarch
1/8 teaspoon salt
1 cup powdered sugar
1/2 cup butter, softened
2 ounces cream cheese
1 teaspoon vanilla
Glaze
1 3/4 cups powdered sugar
1/4 cup fresh lemon juice
assorted sprinkles, for decorating (optional)
Directions:
1) Preheat oven to 375 degrees. Line cookie sheets with parchment paper and set aside.
2) In a medium bowl, whisk flour, cornstarch and salt until combined.
3) In a large bowl, add powdered sugar, butter, cream cheese and vanilla and beat at medium speed until light and fluffy.
4) Add flour mixture to butter mixture, stirring until combined. (Note: dough will be dry and crumbly).
5) Shape dough into 1-inch balls (be careful not to overwork dough) and place on prepared cookie sheets.
6) Bake for 8 to 10 minutes, or until bottoms of cookies are lightly browned. Cool 5 minutes of pan and then move to wire rack to cool completely.
Glaze: In a medium bowl, whisk powdered sugar and lemon juice until smooth. Dip the tops of cooled cookies into glaze and place on wire rack. Decorate with sprinkles, as desired. Let cookies stand until glaze is set.
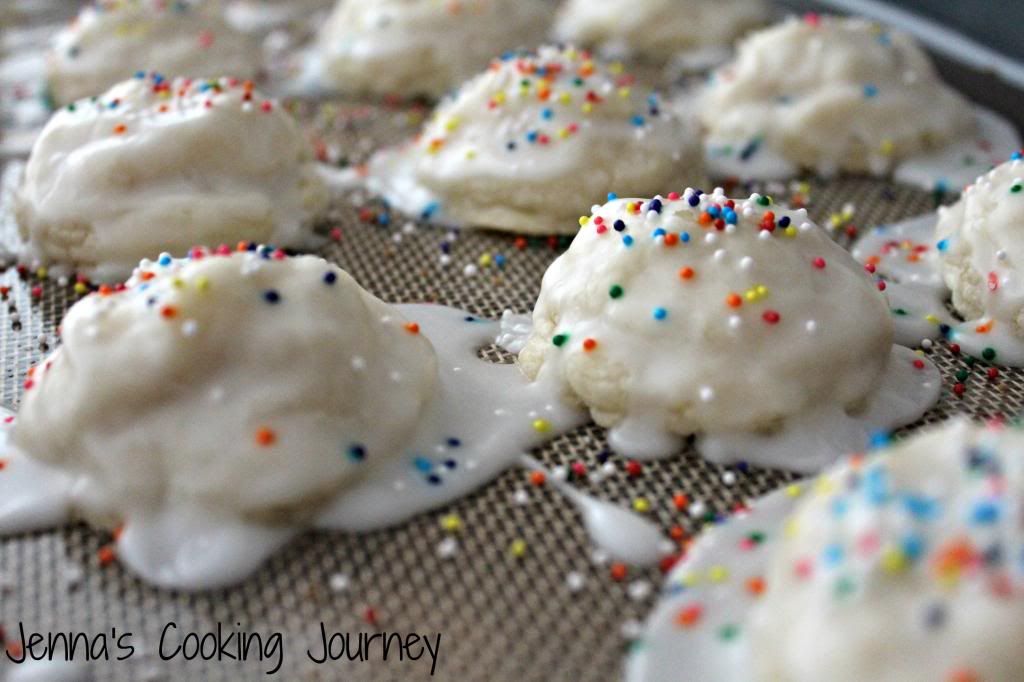
I have to admit that I thought these cookies were more addicting without the glaze. To me the glaze tasted better after it had awhile to sit, but I still think they were better without. These were slightly bigger than bite sized for me, but I definitely could have made them smaller too. I only yielded 20 cookies, while Alida said the recipe makes 36. These are fantastic cookies, and I'm glad I ran across them for the challenge.
Friday, April 26, 2013
Tex-Mex Sloppy Joes
Last Blogger's Choice recipe swap I participated in, I made Magic Monster Cookie Bars from Kate's Recipe Box. This time around for the Blogger's Choice swap, I received Kate's blog again, so I decided to make one of the other recipes from her blog that I had wanted to make: Tex-Mex Sloppy Joes. These have been going around a lot of blogs that I read, so I knew they had to be good.
Tex-Mex Sloppy Joes
slightly adapted from Kate's Recipe Box
Ingredients
1 can (14.5 oz) tomato sauce
2 teaspoons oregano
1 tablespoon ground cumin
1 teaspoon dried cilantro
1/4 teaspoon ground allspice
2 teaspoons Worcestershire sauce
1 1/4 lbs ground turkey
1 teaspoon canola oil
1/2 medium yellow onion, diced
1 jalapeno, minced (without seeds for less heat, with seeds for more)
2 cloves garlic, minced
12 oz. beer, such as a light ale or lager
2 tablespoons ketchup
1/4 cup fresh cilantro
1 tablespoon lime juice
Salt and black pepper to taste
Hamburger buns, cheese (I used pepper jack) and guacamole, for serving
Directions,
1) In a bowl, whisk together the tomato sauce, oregano, ground cumin, dried cilantro, allspice and Worcestershire sauce.
2) In a large skillet over medium heat, brown the ground meat, stirring occasionally until no longer pink, about 10 minutes. Drain off the fat.
3) Add the canola oil to the pan with the browned meat then stir in the diced onion and the jalapeno. Cook until soft, about 5 minutes. Add the garlic and cook for an additional 30 seconds. Stir in the tomato mixture, along with the beer, ketchup and cilantro until well combined.
4) Let all ingredients come to a low simmer and then reduce the heat to medium-low and cook uncovered for 15 minutes.
5) Toast buns under the broiler until lightly browned.
6) Stir in the lime juice and season with salt and pepper to taste. Serve on warmed buns with cheese and guacamole.
My modifications and substitutions were based on things that I couldn't eat in the original recipe. I think the chipotle in adobo would add that smoky flavor, that these don't have. However, these turned out to be the best sloppy joes that I have made so far. I used ground turkey since I knew there would be so many other flavors. I think what made these great was the addition of the beer. It gave just that extra kick of flavor. I did use pepper jack on top of using the jalapeno with the seeds, so ours were a little on the spicy side. Thanks again for another great recipe Kate!
Thanks again Sarah, at A Taste of Home Cooking, for hosting the swaps. They always result in great food! Please find the other recipes from the swap below.
Wednesday, April 17, 2013
Chilaquiles with Salsa Verde
Sometimes my work day seems really long and by the time I get home I don't want to make dinner and even ordering out seems like too much work. This is where this meal comes in handy. If you use store bought chips, this meal takes about 10 minutes, and is delicious. Plus, it isn't too expensive to make.
Chilaquiles with Salsa Verde
from Everyday with Rachael Ray
Ingredients
3 cups salsa verde
Directions 1) In food processor, mix salsa and chiles for 20 seconds.
2)) Pour sauce into large nonstick skillet; bring to simmer over medium. Lower heat to medium-low, add chips and toss to soften slightly.
3) Divide among plates. Top with sour cream, cheese, radishes and cilantro.
I have never had radishes before this dish, so it was a new experience for me...I didn't realize they were had a kick towards the end of eating them. I liked this dish a lot, but I found it kind of spicy. I really need to start reading the labels on the jars of salsa that I buy, I think I'd save myself some pain, although the radishes probably didn't help either.
I made chips from scratch using corn tortillas and Jacob said that the homemade chips made it even better. Jacob didn't even miss the meat in this dish and went back for seconds. Whether you make your chips from scratch or just buy a bag of your favorite chips at the store, this is a great, simple dinner.
Chilaquiles with Salsa Verde
from Everyday with Rachael Ray
Ingredients
3 cups salsa verde
3 4 1/2 ounce cans diced mild green chiles
6 cups tortilla chips
1 cup sour cream
5 ounces queso fresco (or Mexican blend), crumbled
1/4 cup sliced radishes
1/4 cup chopped cilantro
2)) Pour sauce into large nonstick skillet; bring to simmer over medium. Lower heat to medium-low, add chips and toss to soften slightly.
3) Divide among plates. Top with sour cream, cheese, radishes and cilantro.
I have never had radishes before this dish, so it was a new experience for me...I didn't realize they were had a kick towards the end of eating them. I liked this dish a lot, but I found it kind of spicy. I really need to start reading the labels on the jars of salsa that I buy, I think I'd save myself some pain, although the radishes probably didn't help either.
I made chips from scratch using corn tortillas and Jacob said that the homemade chips made it even better. Jacob didn't even miss the meat in this dish and went back for seconds. Whether you make your chips from scratch or just buy a bag of your favorite chips at the store, this is a great, simple dinner.
Monday, April 15, 2013
Roasted Eggplant Spread
It's time for another Eating the Alphabet Challenge. I missed last month as March is the craziest month in my family. Three birthdays and an anniversary all within two weeks is a lot to do.
This month, the letters for the alphabet challenge were 'E' or 'F'. I honestly wanted to try something with figs. I found some great goat cheese and fig recipes, but then I found out that they aren't really in season yet. Nonetheless, when they do come into season, I found some great recipes.
When I ruled figs out, I kept thinking about eggplants. I am one of the few people that I know personally that LOVES them. If I was still single, I think I'd eat several of them a week, but my husband isn't a fan. One of my favorite flavors for eggplants is roasting them, so I found this new recipe for a spread that I knew would be simple yet delicious.
Roasted Eggplant Spread
slightly adapted from FoodNetwork
Ingredients
I like this spread as an appetizer idea because it seems like a lot of appetizers are either really heavy with cheese or meat based. This is really simple, but the roasted flavor of both vegetables really comes through. Depending if you like roasted red peppers or the roasted eggplant more, you could go heavier on the vegetable that you like. I served these with pita chips and it was amazing. Definitely a great appetizer.
Please check out all the other letter 'E' and 'F' submissions below. Thanks Brenda for hosting this challenge!
This month, the letters for the alphabet challenge were 'E' or 'F'. I honestly wanted to try something with figs. I found some great goat cheese and fig recipes, but then I found out that they aren't really in season yet. Nonetheless, when they do come into season, I found some great recipes.
When I ruled figs out, I kept thinking about eggplants. I am one of the few people that I know personally that LOVES them. If I was still single, I think I'd eat several of them a week, but my husband isn't a fan. One of my favorite flavors for eggplants is roasting them, so I found this new recipe for a spread that I knew would be simple yet delicious.
Roasted Eggplant Spread
slightly adapted from FoodNetwork
Ingredients
1 medium eggplant
1 red bell peppers, seeded
2 garlic cloves, minced
3 tablespoons good olive oil
1 1/2 teaspoons kosher salt
1/2 teaspoon freshly ground black pepper
1 teaspoon oregano
Directions
1) Preheat the oven to 400 degrees F.
2) Cut the eggplant and bell pepper into 1-inch cubes. Toss them in a large bowl with the garlic, olive oil, salt, pepper, and oregano. Spread them on a baking sheet. Roast for 45 minutes, until the vegetables are lightly browned and soft, tossing once during cooking. Cool the vegetable mixture slightly.
3) Place the vegetables in a food processor fitted with a steel blade, pulse 3 or 4 times to blend. Taste for salt and pepper. I like this spread as an appetizer idea because it seems like a lot of appetizers are either really heavy with cheese or meat based. This is really simple, but the roasted flavor of both vegetables really comes through. Depending if you like roasted red peppers or the roasted eggplant more, you could go heavier on the vegetable that you like. I served these with pita chips and it was amazing. Definitely a great appetizer.
Please check out all the other letter 'E' and 'F' submissions below. Thanks Brenda for hosting this challenge!
Friday, April 12, 2013
Chicken Parmesan Roll-ups
This time the theme for the recipe swap, hosted by A Taste of Home Cooking, was Chicken. I entered this swap mainly because it seems like I'm always struggling to find new ways to eat chicken. When I ask my husband what kind of chicken dishes he wants for the week, he always requests barbeque chicken, and while I love barbeque chicken, it is nice to find other recipes.
I received My Chicago Kitchen's Gluten Free Chicken Parmesan Roll-ups. I've actually never made chicken parmesan before. I made tofu parmesan back when I first joined the swap. I was excited though because I think roll-ups can be a fun vessel for fillings.
Chicken Parmesan Roll-ups
adapted from My Chicago Kitchen
Ingredients
4 boneless, skinless chicken breasts, pounded thin
1/2 cup ricotta cheese
4 tablespoons parmesan cheese
8 tablespoons shredded mozzarella cheese, plus more for topping
1/8 cup frozen spinach, defrosted and strained
4 basil leaves, divided (I tore mine into small pieces)
4 roasted red pepper halves (I used jarred), trimmed to fit inside the chicken breasts
1 jar favorite marinara sauce (or 1 1/2 c. prepared marinara)
Toothpicks
Directions
1) Heat oven to 350 F.
2) Mix together in a bowl the ricotta, parmesan cheese, shredded mozzarella, and spinach.
3) Lay chicken down in front of you and distribute evenly the ricotta mixture. On top of the mixture place basil pieces, and red pepper pieces.
4) Roll up the chicken breasts and secure them with your toothpicks.
5) Pour 1 cup marinara into the bottom of a 9 x 13 in. pan and nestle in your roll-ups, seam side down. Top with remaining marinara and additional cheese. Bake uncovered 45-50 minutes, until cooked through. When ready to serve, spoon cooked marinara over the top.
Angie's recipe doesn't have a ricotta mixture on the inside, but since it isn't a breaded chicken dish, I felt it needed a little more filling. The problem I ran into was putting so much filling into each chicken breast, that they were hard to roll. These were delicious. I loved the spinach and the roasted red pepper combination on the inside. This dish was easy to put together and tasted really delicious.
Please check out all the other chicken recipes from this swap below!
Subscribe to:
Posts (Atom)